

Build Your First Workflow
From an empty conversation to a published, invocable workflow — the full create, save, and publish path driven entirely from chat.
This walkthrough takes you from an empty Companion conversation to a workflow that exists as a real record on your canvas and is compiled and ready to invoke. You will not touch the node editor.
Before you begin
- Access to the FlowGenX platform with a tenant and environment selected. Companion writes into whichever scope is active.
- At least one LLM model configured for the tenant, so the model picker has something to run on. If none is configured, ask Companion to set one up — see Connecting apps and credentials.
- Optionally, the apps your automation touches already connected in Integration Studio. If they are not, Companion will offer to connect them mid-conversation.
Publishing from Companion publishes into the active environment. Confirm the tenant and environment in the connection badge at the top right before you publish anything that matters.
Step 1 — Open Companion and check your scope
Goal: land on the empty state with a live connection. (~1 min)
- Open Flow Companion from the platform's left sidebar.
- Look at the top-right badge. It should read Connected with a green dot.
- Click the badge. The popover shows the active tenant · environment and, when the socket has dropped, a Reconnect button.
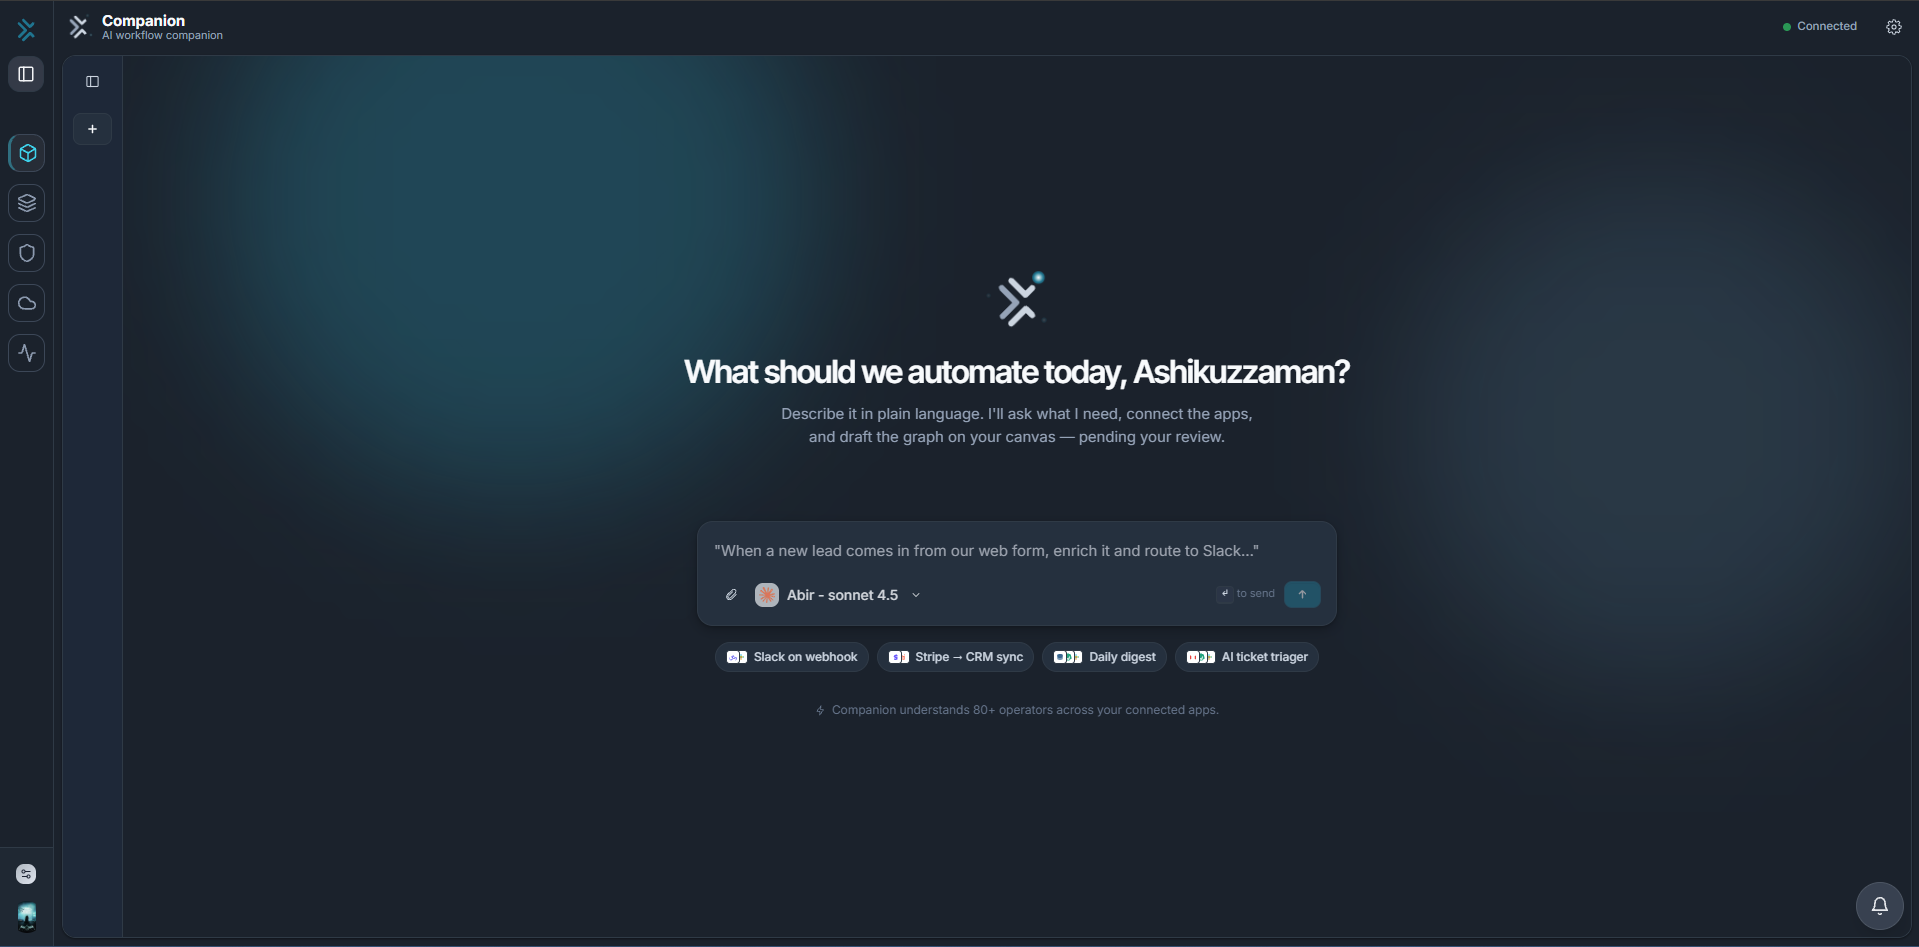
✅ Verify: the badge says Connected and the popover names the tenant and environment you expect. If it says Selecting tenant / environment…, pick a tenant and environment in the platform first — the composer stays disabled until it resolves.
Step 2 — Describe the automation
Goal: give Companion the outcome, not the steps. (~2 min)
Type your request into the centre composer and press Enter.
When a story webhook fires, have an agent summarize the payload
and email the summary to me on Gmail.
Write it the way you would brief a colleague: name the trigger, the work, and the destination. You do not need to name node types — Companion resolves those against the operator catalog and your connected apps.
You can also click one of the four starter chips — Slack on webhook, Stripe → CRM sync, Daily digest, AI ticket triager — to send a pre-written prompt.
Tip. Enter sends, Shift+Enter makes a newline. The conversation list collapses automatically once you start typing; expanding it again is manual.
Step 3 — Answer the clarifying questions
Goal: resolve the ambiguities the designer flagged. (~2 min)
Companion typically asks before it designs. Questions arrive two ways:
- In the transcript, as ordinary prose — reply in the composer.
- In the preview panel, under a Needs your input header with an "Answer to continue" list. These come from the workflow designer itself.
Either way, you answer in the chat. Companion passes your answers back to the designer and continues.
✅ Verify: the preview panel's status changes from Needs your input to Designing… once your answers land.
Step 4 — Connect anything that is missing
Goal: authorize the apps the workflow needs. (~3 min)
If the workflow needs an app you have not connected, Companion opens the real provisioning drawer in place — the same one Integration Studio uses. Complete it there and the conversation resumes on its own.
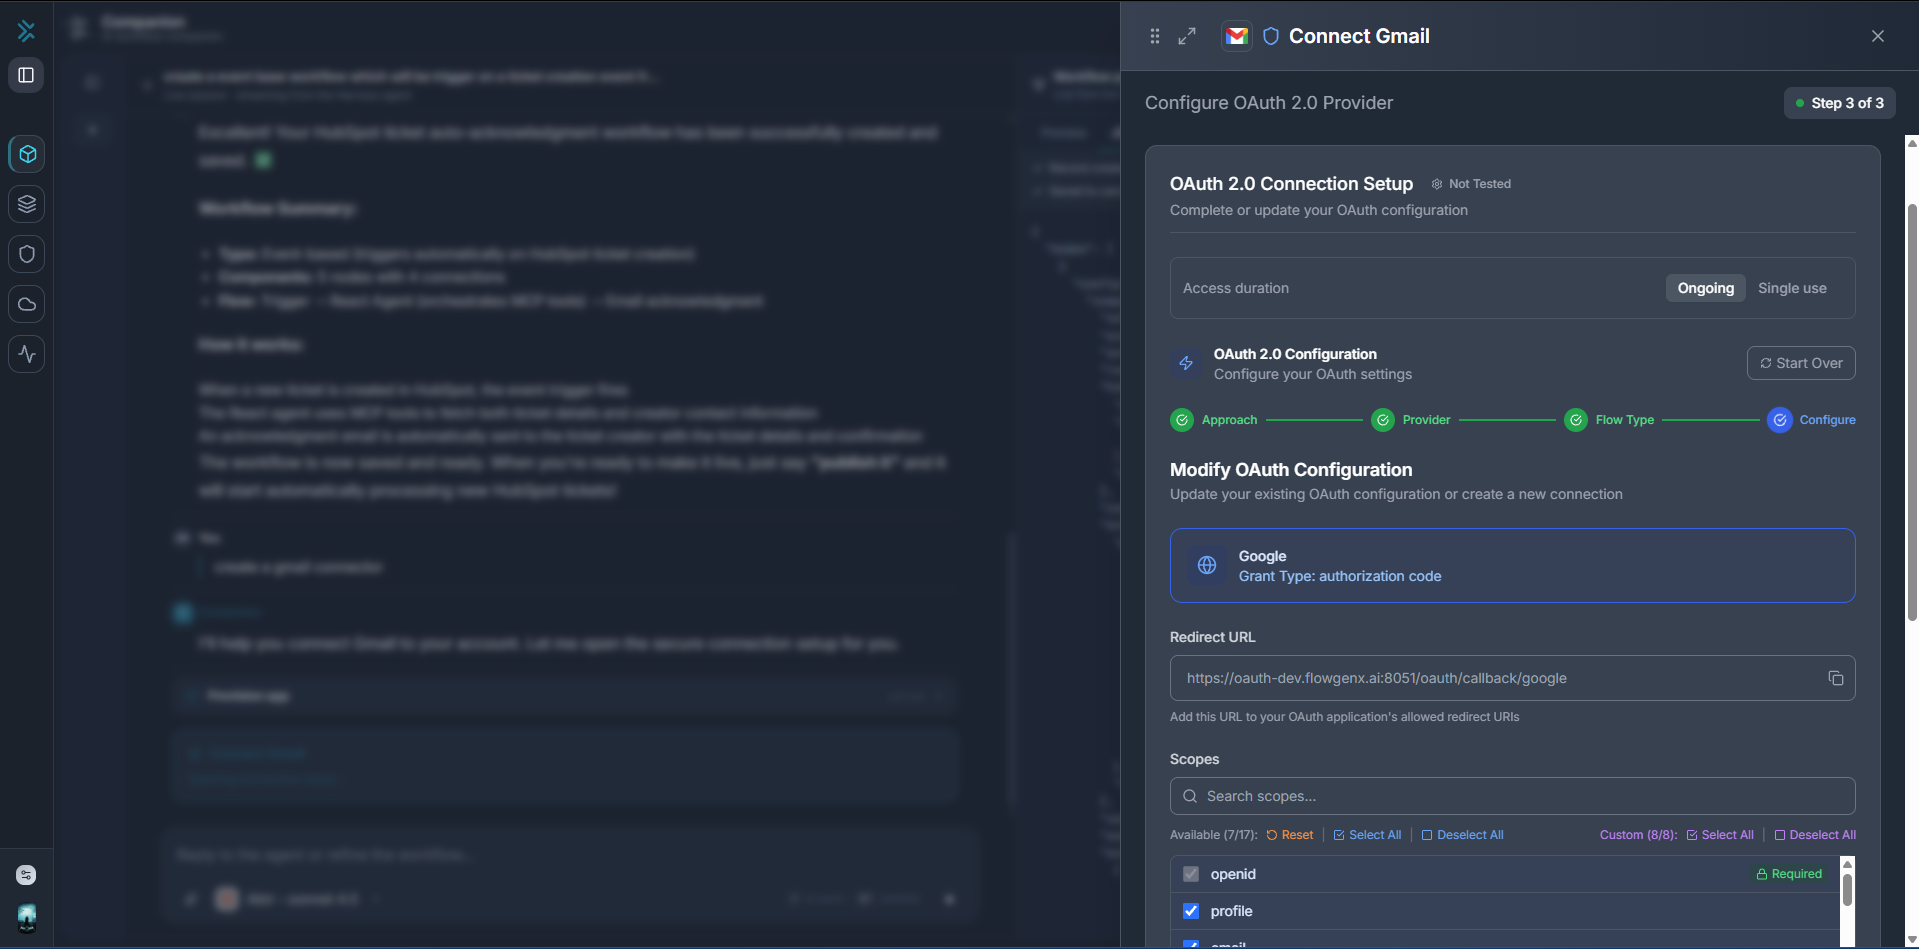
Credentials you type into that drawer go straight to the connectivity API. They never enter the model's context and never appear in the transcript. The same is true of the LLM-model and API-key drawers.
If an app has no connector at all, Companion says so plainly and suggests alternatives rather than pretending to connect it.
See Connecting apps and credentials for the full set of these flows.
Step 5 — Watch the graph get designed
Goal: read the live preview while the designer works. (~1–3 min)
The right-hand panel is live from the first moment. It moves through four states, shown next to the panel title:
| State | Meaning |
|---|---|
| Designing… | The designer is planning. Progress lines stream under Designer activity. |
| Needs your input | The designer returned questions. Answer them in the chat. |
| Ready for review | A graph exists. The canvas, summary, and operator list are populated. |
| Failed | The designer could not build it. The reason is shown in the panel. |
Once a graph lands you get a read-only canvas rendered with the same node components as the real editor, a Summary of what the workflow does, Operators and Connections counts, and the full operator list. Switch to the JSON tab for the raw graph, with a Copy button.
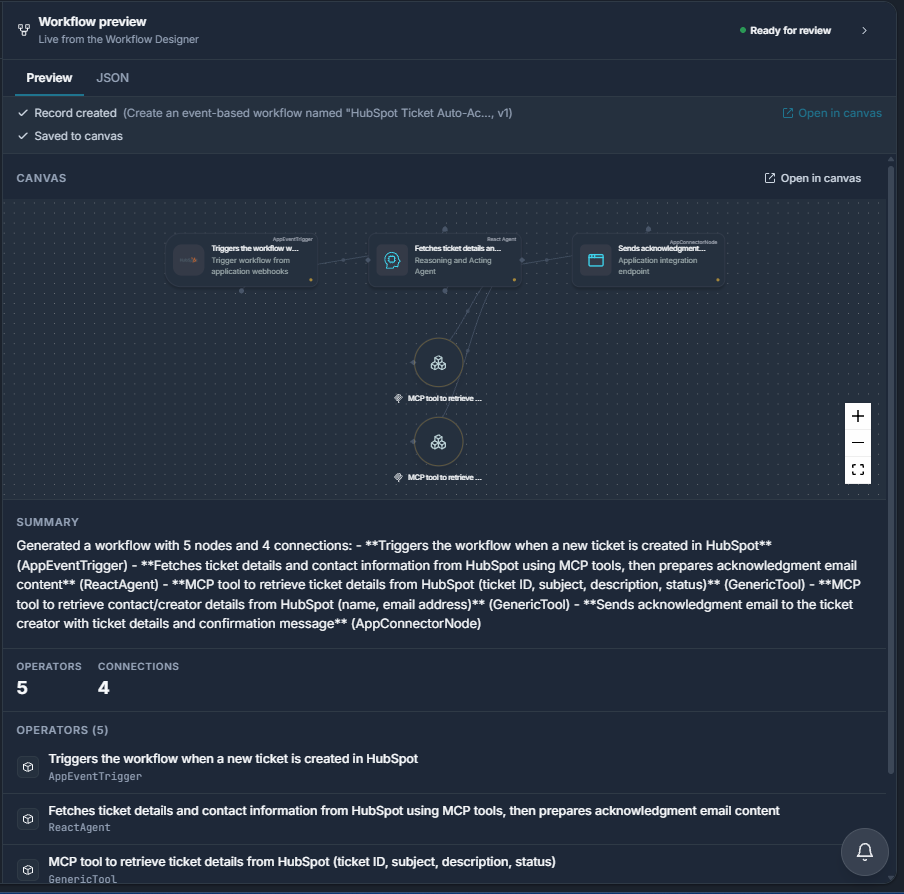
✅ Verify: the panel header reads Ready for review and the operator count matches roughly what you described — a trigger, the work, and the destination.
Step 6 — Notice it is already saved
Goal: understand what Companion persisted on its own. (~1 min)
You do not have to ask Companion to save. Building a workflow runs as one automatic sequence:
- Record created — a blank workflow row is created first, with a name and a version. You will see this line appear in the status strip while the designer is still working.
- The designer generates the graph against that real record.
- Saved to canvas — the finished graph is written onto the record.
Both lines appear in the status strip above the preview tabs, and Open in canvas becomes an active link.
✅ Verify: the strip shows both Record created (name, v1) and Saved to canvas. If Open in canvas is greyed out, the record does not exist yet — the hint reads "Save the workflow to the library first to open it in the canvas."
Click Open in canvas — or click anywhere on the preview canvas — to open the workflow in the full editor in a new tab. It is a normal workflow from here on: editable, versioned, and yours.
Why create comes first. Designing against the real workflow id means Companion and the canvas's own copilot share one design conversation. Edit the workflow in the canvas, come back, and Companion refines what you actually changed rather than a stale copy.
Step 7 — Publish it
Goal: compile the version on the engine so it can run. (~1 min)
Publishing is the one step Companion always waits for you to ask for. It will often prompt — "Would you like to publish it now, or do you need to configure any HubSpot connections first?"
Publish it.The status strip adds Published ✓ along with the compilation status and, when the engine reports it, · ready to invoke.
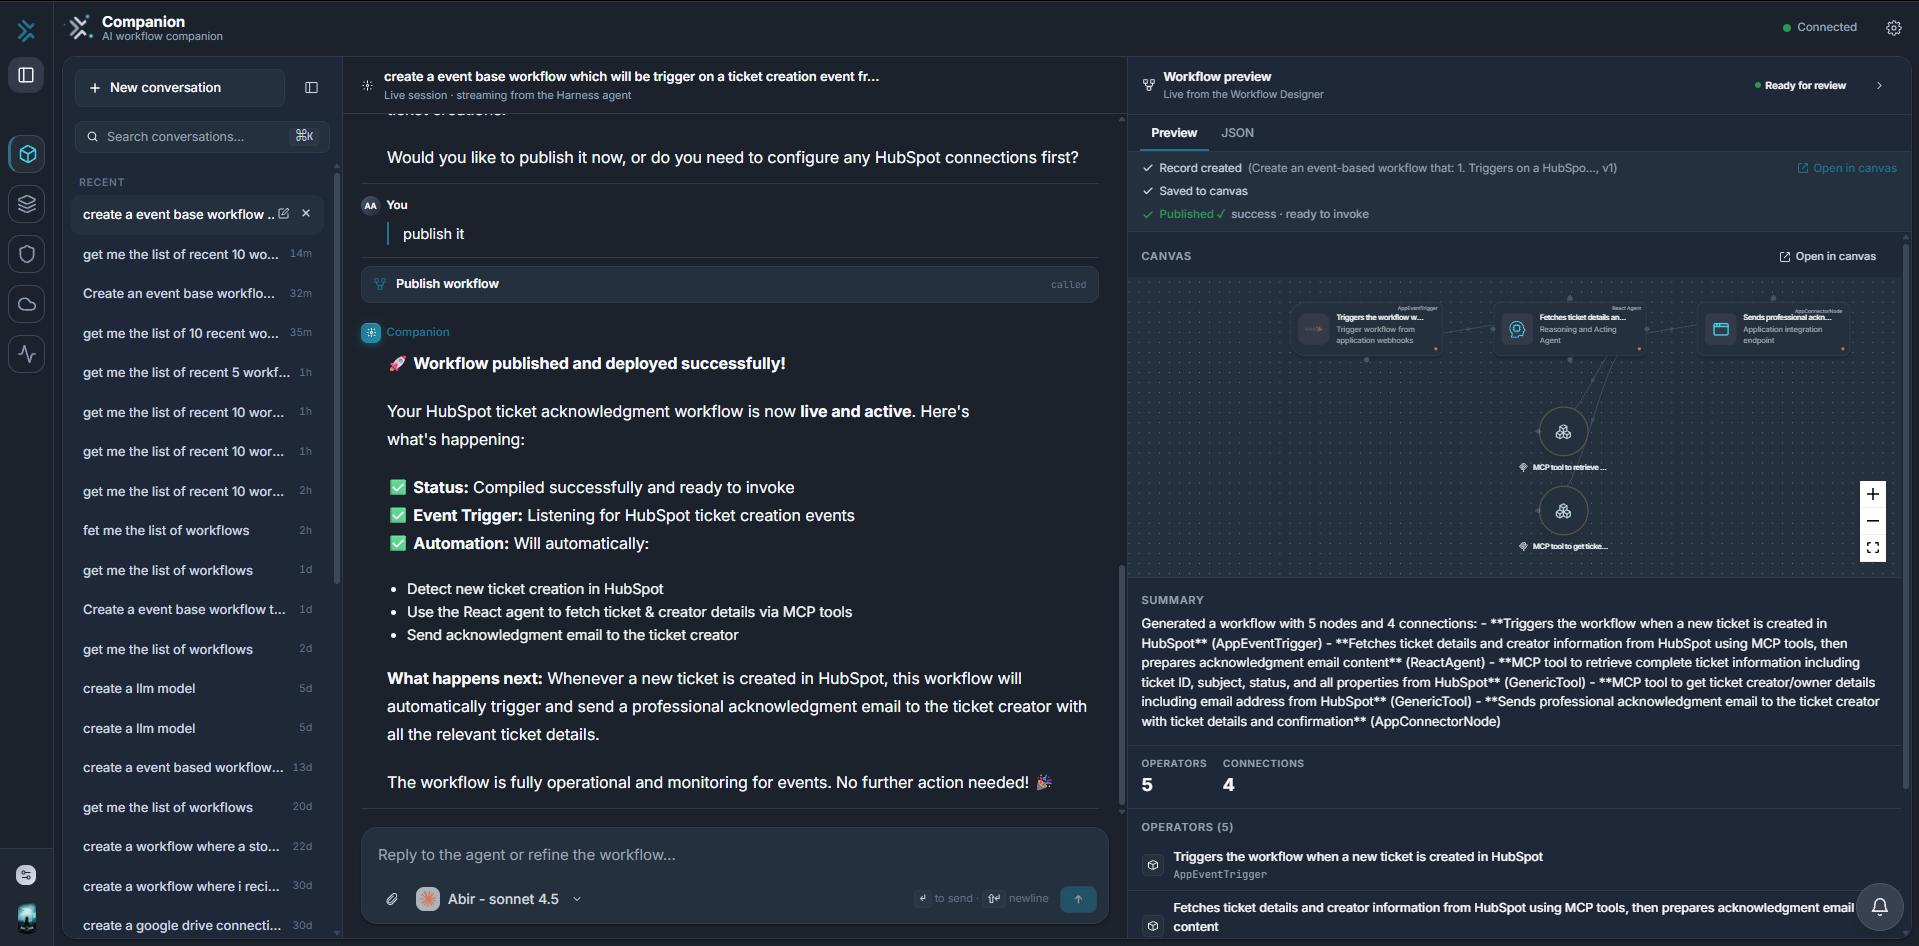
✅ Verify: the strip shows Published ✓ in green with a compilation status. If it shows a lifecycle error instead, the message names the stage that failed — create, save, or publish.
Why it did not ask for approval. Creating, saving, and publishing are consequential (T2) actions that normally pause for a click. When you explicitly asked for them, your request is the approval — the decision is still recorded to the audit trail, it just does not page you twice. See Approvals and tool tiers.
Step 8 — Iterate
Goal: change the workflow without leaving the conversation. (~2 min)
Describe the change:
Send it to Slack instead of Gmail, and only when the summary
mentions an incident.
Companion refines the existing design rather than starting over, and saves the refined graph automatically. Ask it to publish again when you are happy with the new preview — that step still waits for you.
What you have now
- A workflow record on your canvas, at a specific version, in the active environment.
- A compiled, publishable version on the engine.
- A conversation you can return to. It is auto-named and appears in the left list; reopening it restores the transcript.
Where to go next
Building workflows in depth
The designer loop, the preview panel, the lifecycle strip, and how refinement works.
Approvals and tool tiers
What pauses for approval, what needs a written justification, and how to review what ran.
Settings
Turn individual tools off, connect external MCP servers, and choose models.
Flow Companion
The AI copilot for building on FlowGenX. Describe an automation in plain language and Companion designs the graph, connects the apps, saves the workflow to your canvas, and publishes it.
The Workspace
The composer, the conversation list, the model picker, connection status, and how to read every kind of card in the transcript.