

Web Automation — E-commerce Checkout with Human Review
Build a browser-automation workflow that searches, carts, and checks out on an e-commerce site — with a Human-in-the-Loop approval before payment.
Automate an end-to-end e-commerce flow with Browser Agents: search for a product, add it to the cart, pause for a human approval, then complete checkout using credentials stored securely in the Vault. This guide walks the whole build on the Workflow Canvas.
What you'll build
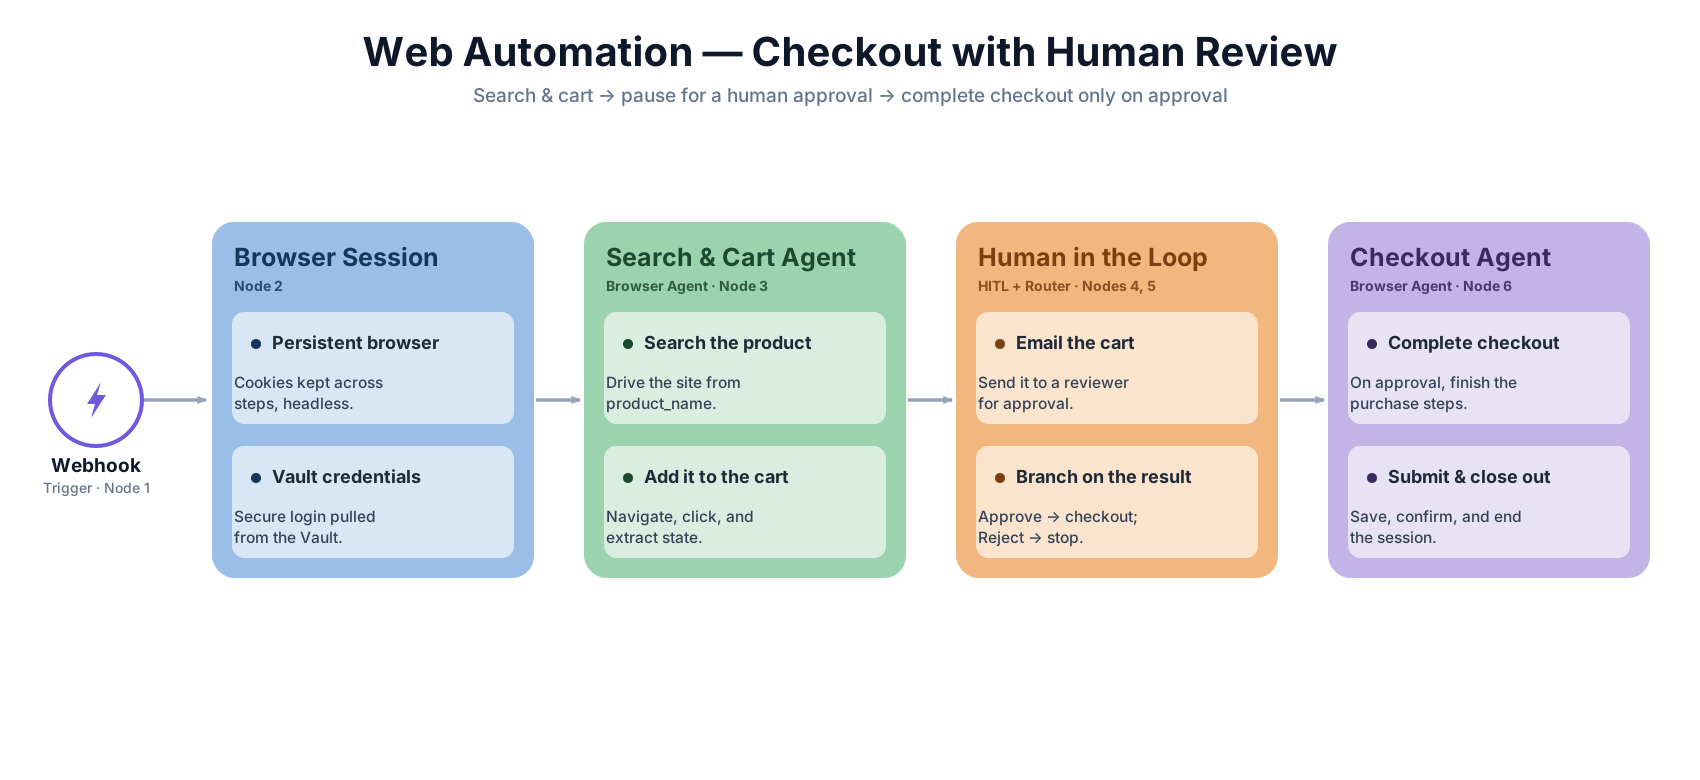
By the end you'll have a published workflow that takes a product_name and a starting_url, drives a browser to search and cart the item, emails the cart to a reviewer, and — only on approval — finishes checkout.
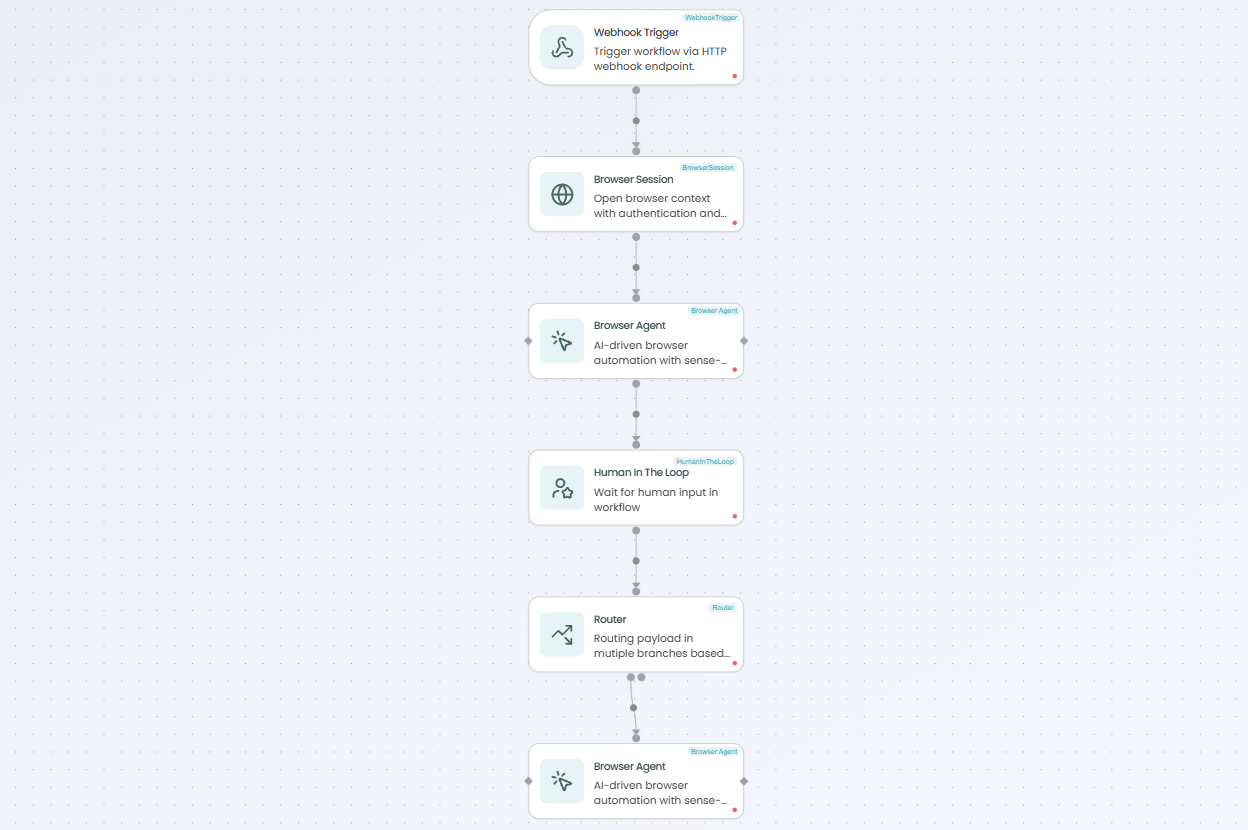
What you'll learn
- Use a Webhook Trigger to pass dynamic inputs (
starting_url,product_name). - Configure a persistent Browser Session and link login credentials via Vault Management.
- Orchestrate two Browser Agents for a multi-step task (Search & Cart → Checkout).
- Insert a Human-in-the-Loop (HITL) approval step and branch on its result with a Router.
- Define Input/Output Schemas so agents pass structured data downstream.
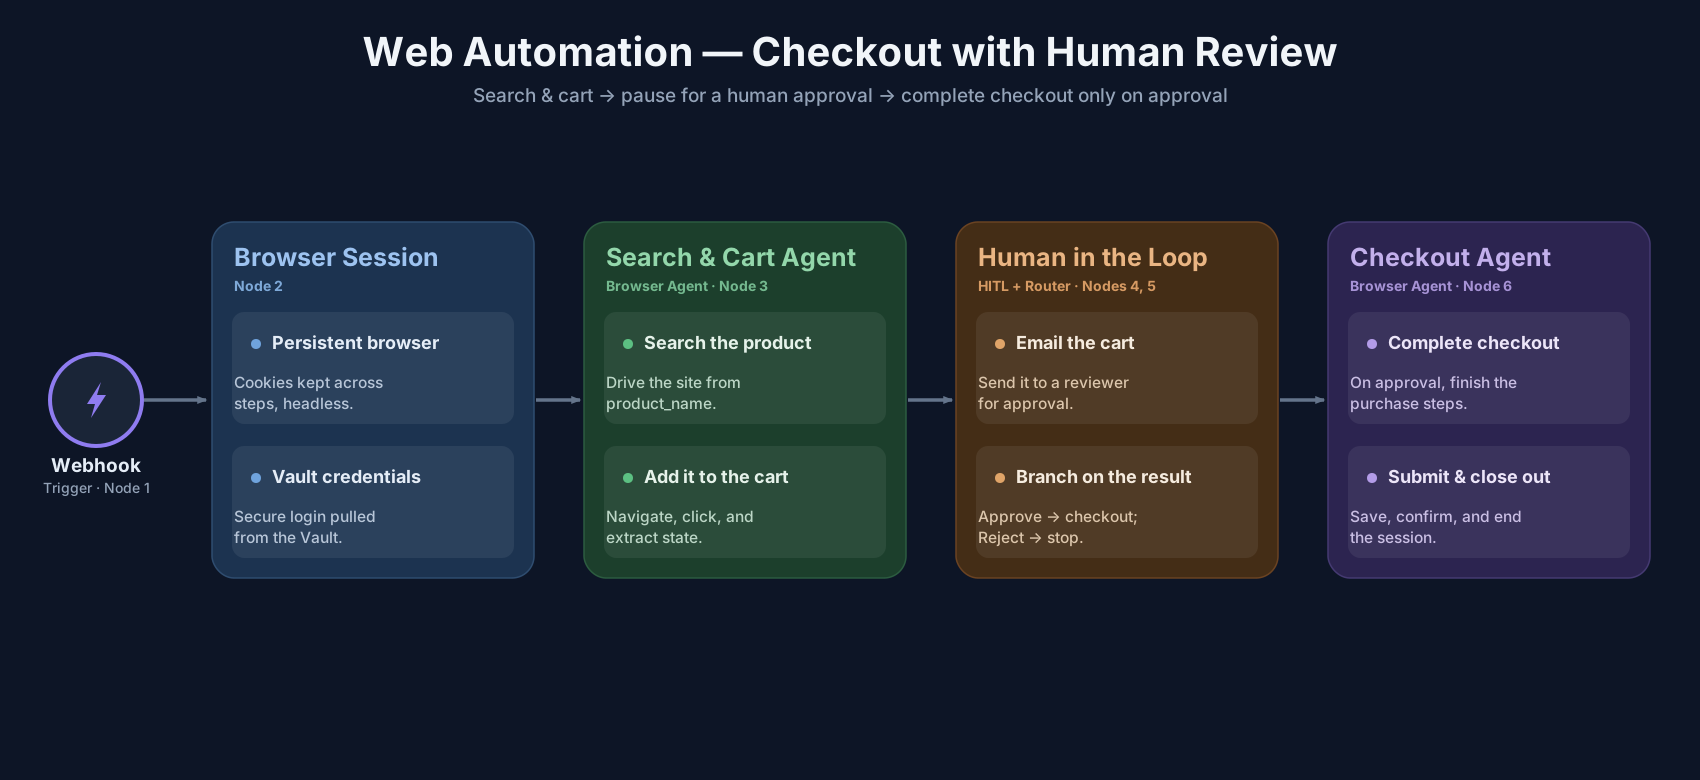
Architecture at a glance
Before you begin
Make sure the following are in place — the first time through this takes 2–3 minutes:
- A FlowGenX account with access to Design → Flow Designer → Workflow Canvas.
- An LLM provider API key (OpenAI, Anthropic, or Gemini).
- E-commerce login and shipping credentials in the Platform Vault (you can also add these later in the Browser Session node).
First time on the platform? Start with the Platform Tour quickstart — it covers navigation, the left-hand menu, and where to find Workflow Canvas, Integration Studio, and the Playground.
Step 1 — Add a Webhook Trigger and define its schema
Goal: set up the workflow entry point and capture dynamic inputs. (~2 min)
- Drag the Webhook Trigger node onto the canvas.
- Click the node to open its configuration panel on the right.
- Open the Schema tab and configure the request payload and response.
- Add two required request fields:
product_name(string) andstarting_url(string). - Click Apply.
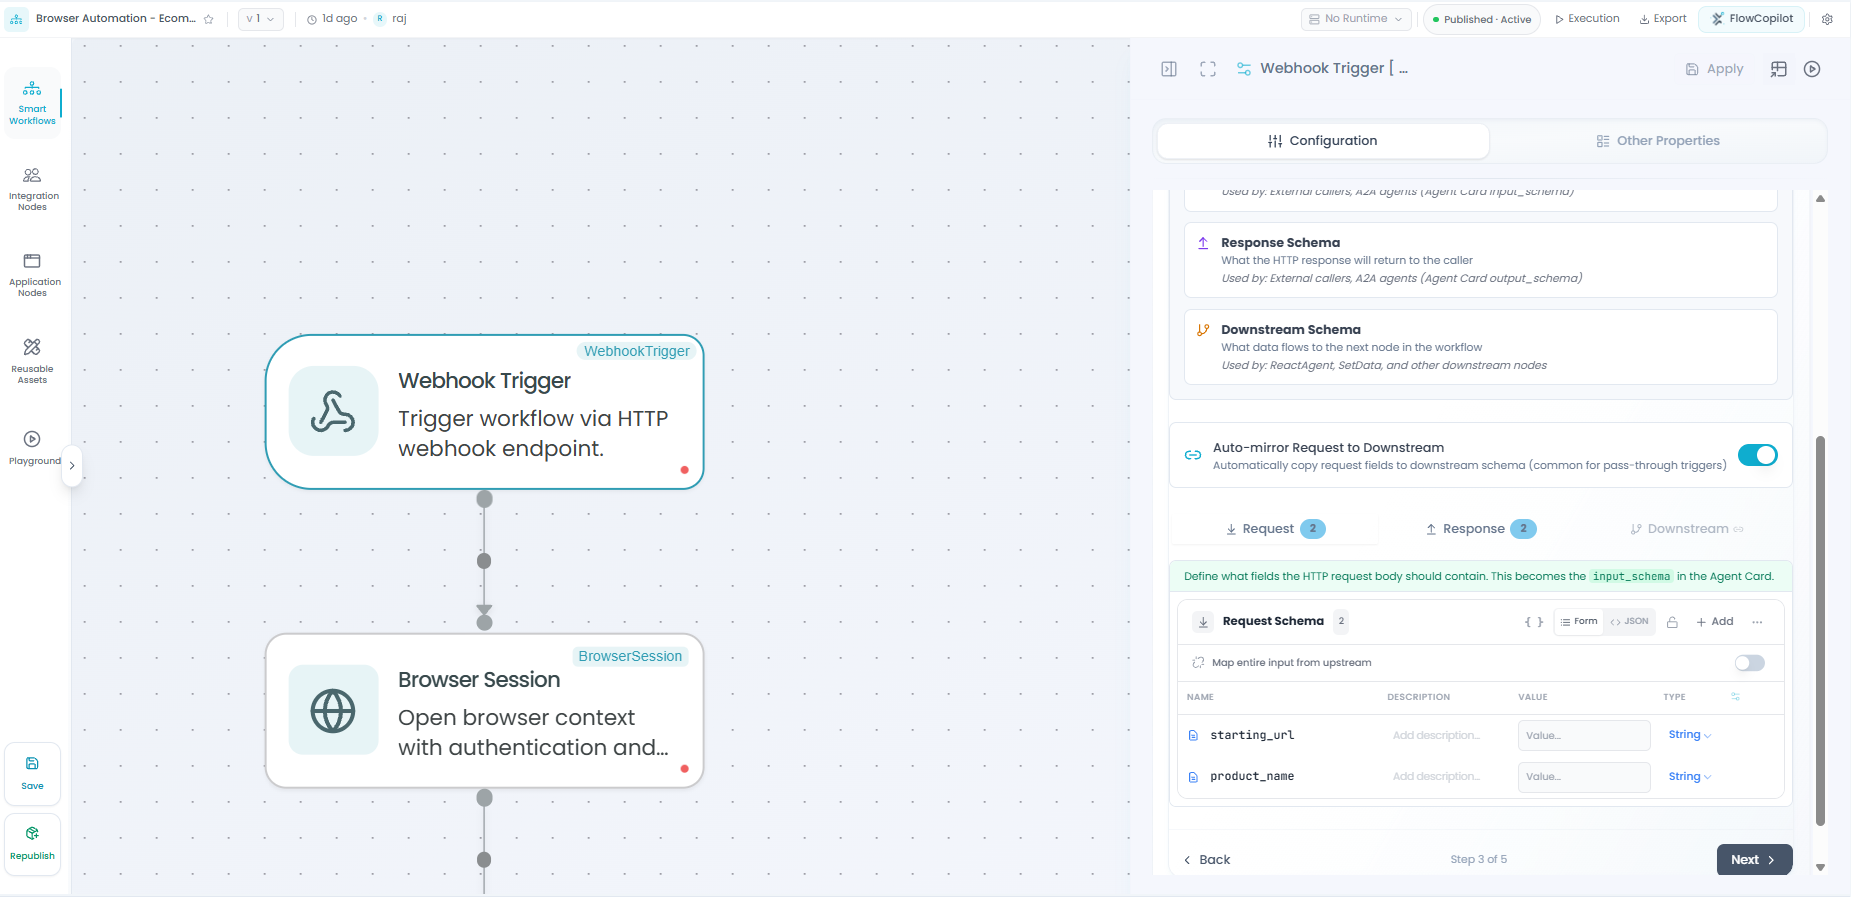
Tip — test payload. In the Playground, use a sample like {"product_name": "T-Shirt", "starting_url": "https://www.amazon.com"} to exercise the flow.
✅ Verify: the Webhook Trigger's Schema tab shows both new fields.
Step 2 — Add and configure a Browser Session
Goal: establish a persistent browser environment and link secure credentials. (~3 min)
- Drag the Browser Session node onto the canvas, below the Webhook Trigger, and connect their edges — the trigger's output feeds the session.
- Click the node to open its configuration panel.
- Set a starting URL (e.g.
www.google.com) where the session begins. - Under Vault credentials, select the stored login for your site (e.g.
Amazon-Login-Vault), or create a new one. - In advanced settings, enable Persist cookies and headless mode.
- Click Apply.
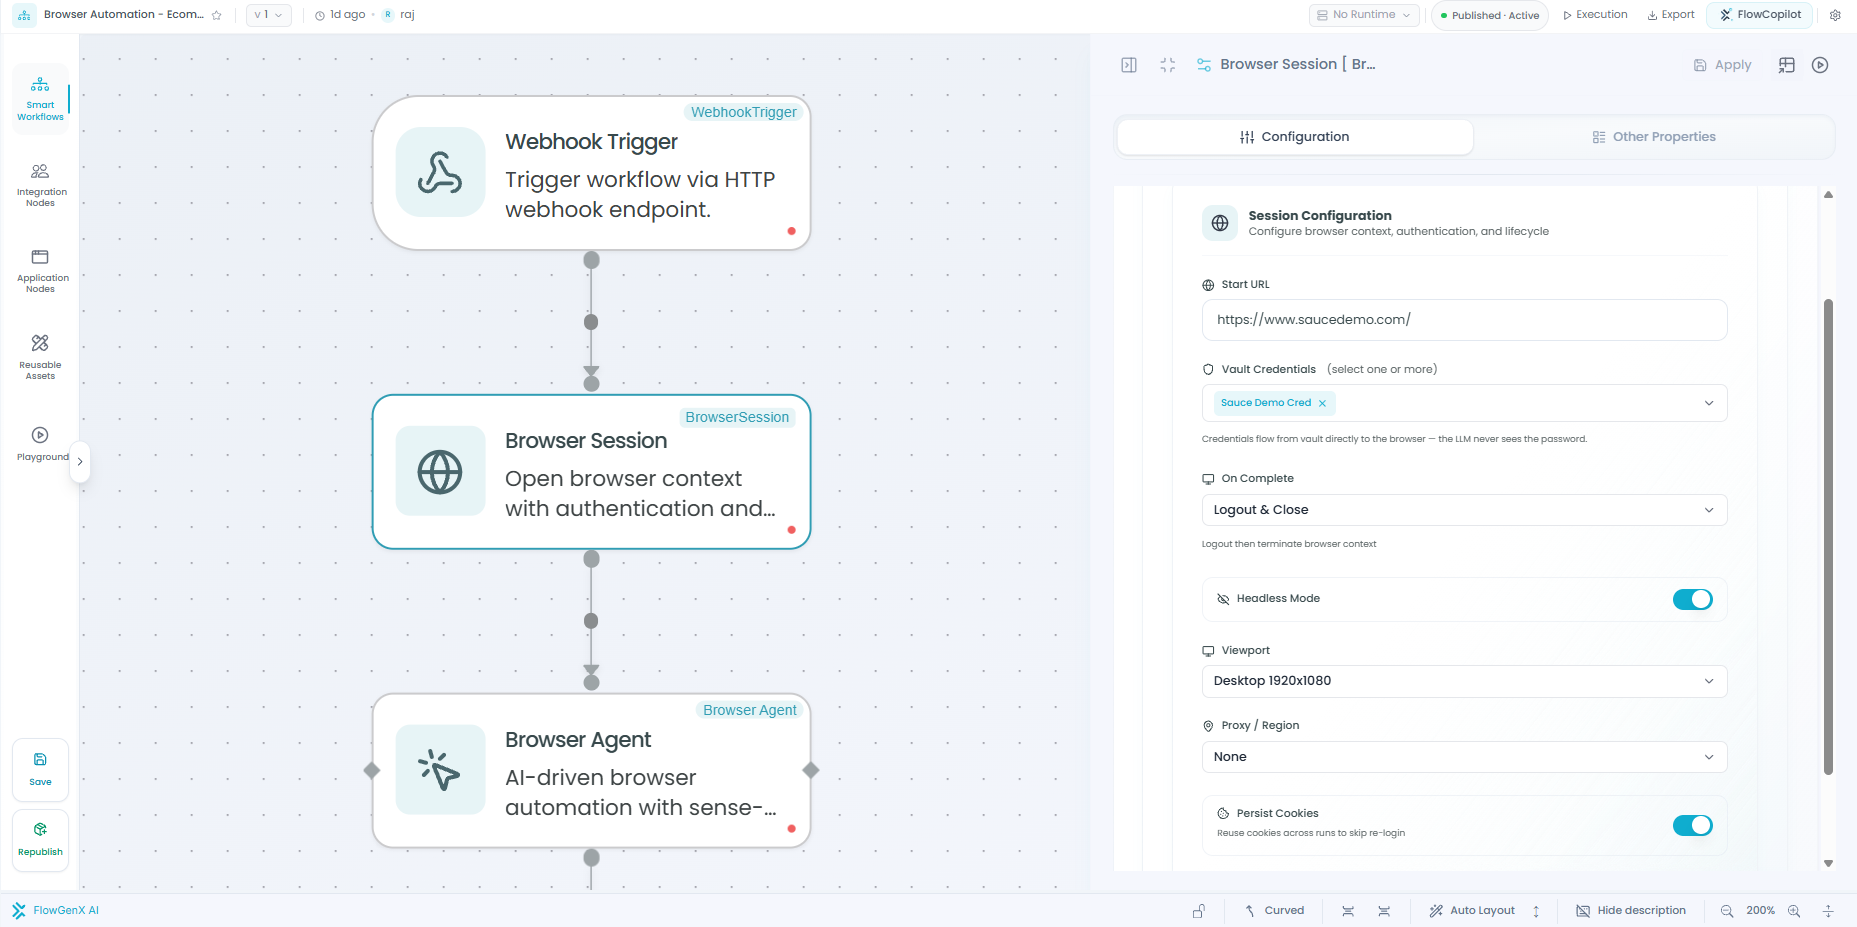
Tip — persistent session. Re-using this same Browser Session for later agents lets them share browser state — cookies and login status — so the checkout agent stays logged in.
✅ Verify: the Browser Session is connected to the Webhook and shows a green "configured" dot.
Step 3 — Configure the first Browser Agent (Search & Cart)
Goal: log in, search for the product, add it to the cart, and output the cart details. (~5 min)
-
Drag a Browser Agent node after the Browser Session and connect their edges.
-
Open the node's Configuration panel.
-
Under Models → LLM Model, choose or create a model (e.g.
gpt-4o). -
Under Prompts → Prompt, paste the system prompt:
You are an e-commerce automation assistant. Log in with the credential provided from the Vault, search for the specified product, and add it to the shopping cart. Use the securely managed Vault credentials for login. Then output
cart_infoandcart_url. -
(Optional) In Steps, add a line-by-line plan for the agent to follow.
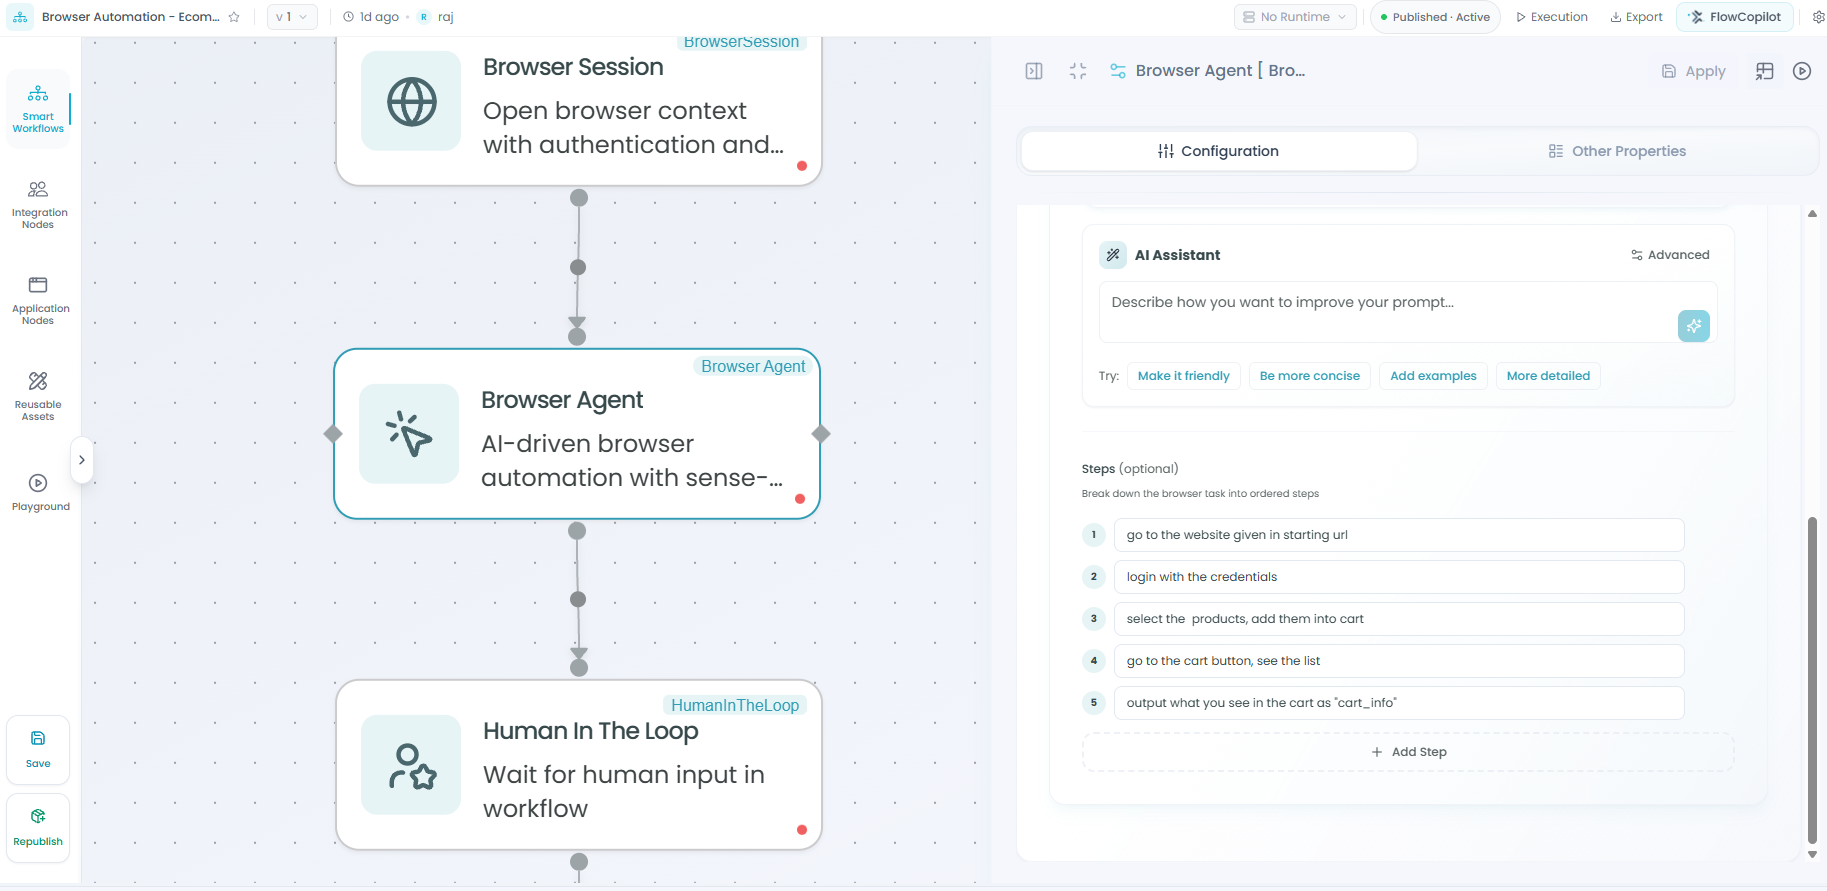
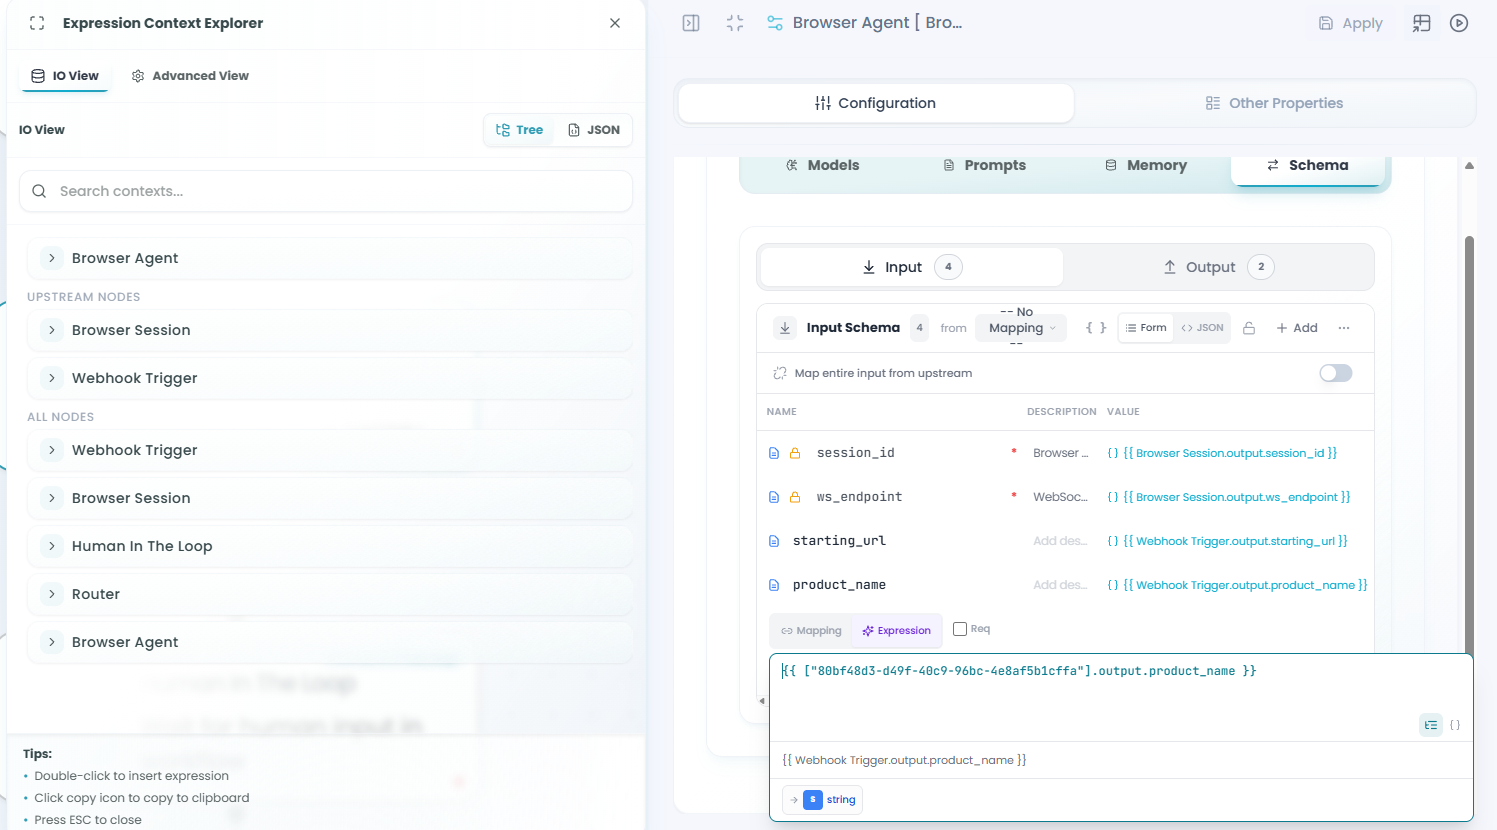
- On the Schema tab → Input, define two inputs —
starting_urlandproduct_name— and map each to the Webhook Trigger's output (via a JEXL expression or by clicking the field in the Context Explorer).
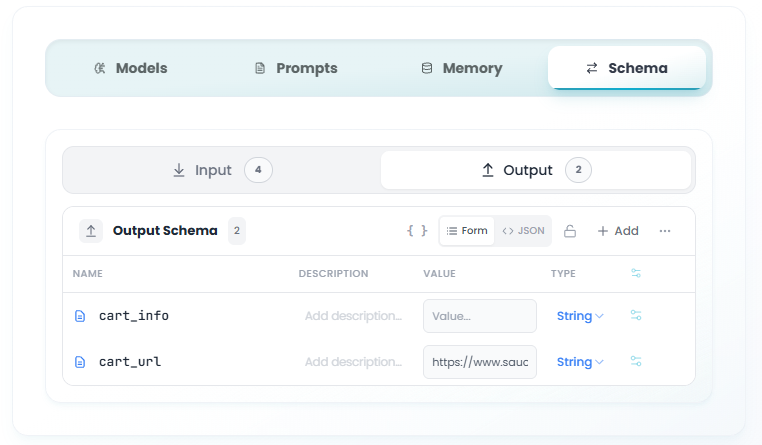
- On the Schema tab → Output, define two output fields —
cart_infoandcart_url. These are structured fields the agent will populate; they don't need an expression.
- Click Apply.
Tip — Vault Management. The Browser Agent automatically uses the credentials linked to the session node, so it logs in without ever exposing secrets in the prompt.
✅ Verify: the agent shows a green "configured" dot and its output schema includes cart_info.
Step 4 — Add a Human-in-the-Loop (HITL) review
Goal: pause the workflow and email the cart to a reviewer for explicit approval before checkout. (~3 min)
- Drag the Human-in-the-Loop node onto the canvas, downstream of the first Browser Agent.
- Set Notification Type to Email.
- Set the Recipient (e.g.
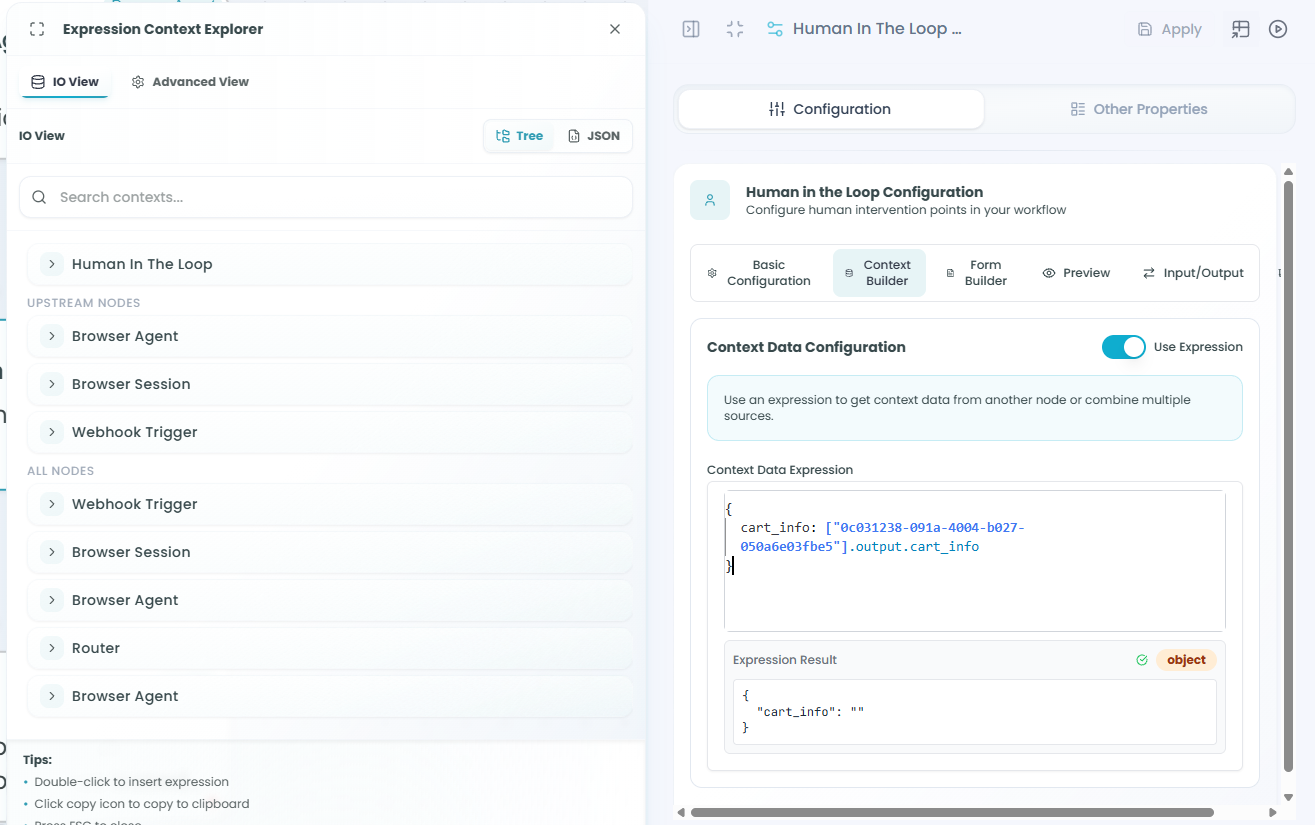
[email protected]). - In the Context Builder, surface the cart details:
Cart Info: {{browser_agent.output.cart_info}}
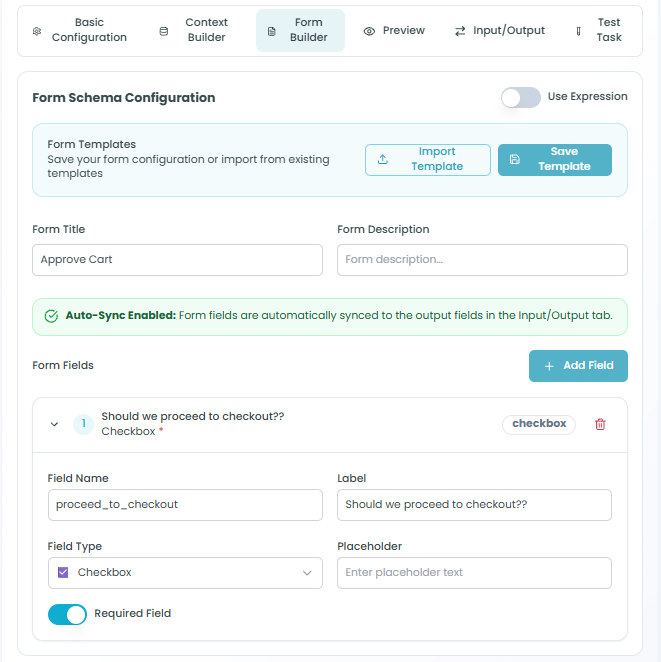
- In the Form Builder, add a required field named
proceed_to_checkout(Boolean / checkbox).
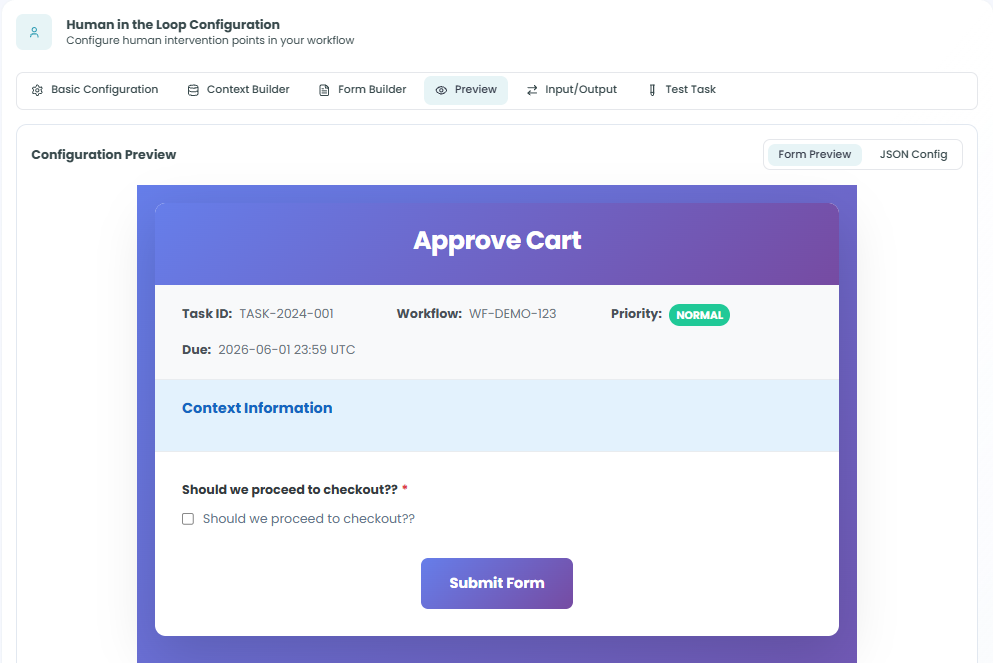
- Check the Preview to see how the form will look to the reviewer.
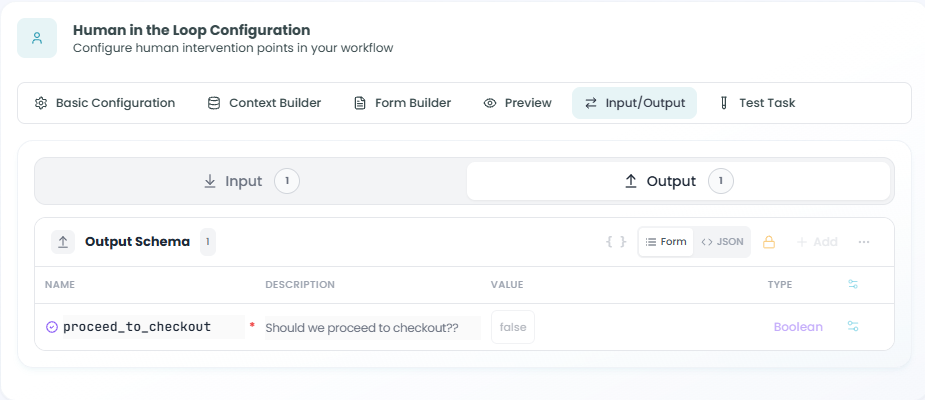
- On the Input/Output tab → Output, confirm the
proceed_to_checkoutfield is present (it's added automatically from the Form Builder). Then click Apply.
⚠ Workflow pause. Once the HITL node is reached, the run pauses indefinitely until the recipient completes the form and clicks Submit.
✅ Verify: the HITL node is connected from the Browser Agent, with an email recipient and a required proceed_to_checkout field.
Step 5 — Add a Router to branch on the decision
Goal: route the workflow based on the reviewer's proceed_to_checkout answer. (~2 min)
- Drag the Router node after the HITL node and connect them.
- Click the Router to define routes.
- With Expression-Based routing enabled, add the expression
proceed_to_checkout === trueon routea. You'll connect the checkout agent to this path. - Leave the fallback route as-is, then click Apply.
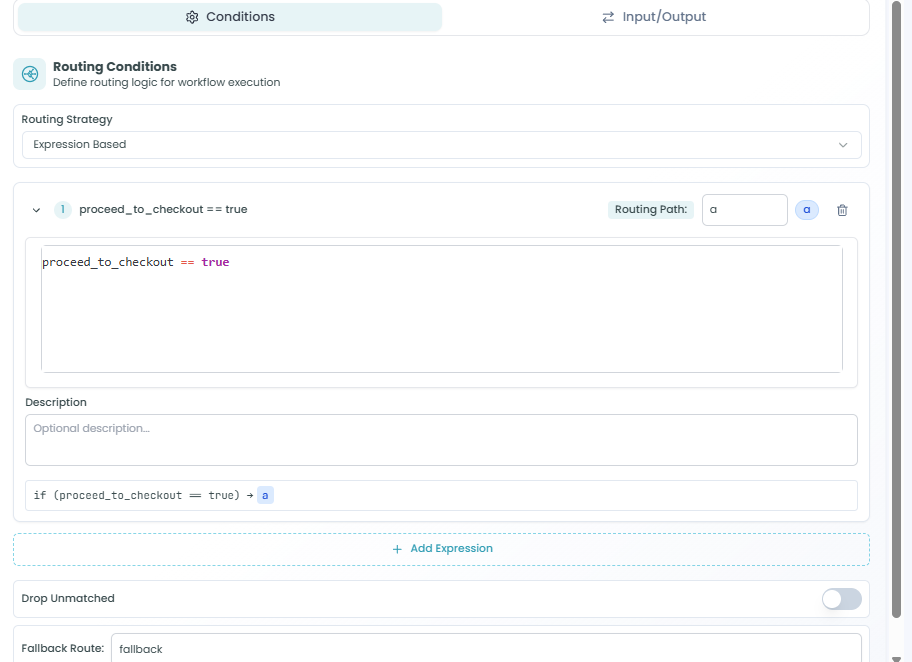
Tip — Router fallback. The Router is ideal for simple binary decisions from an upstream output — like a user's choice or a validation result. The fallback path handles everything that doesn't match.
✅ Verify: the Router shows two labeled outbound connections — the proceed path and the fallback.
Step 6 — Configure the final Browser Agent (Checkout)
Goal: resume the session and complete the order using Vault-stored details. (~4 min)
-
Drag a second Browser Agent onto the canvas and connect the Router's
apath to it. -
In its Configuration panel, it re-uses the same Browser Session from Step 2.
-
Under Prompts → Prompt, paste the system prompt:
You are a final-step automation assistant. Navigate to the cart, verify the contents, and complete checkout using the pre-configured shipping and payment details from the Vault.
-
(Optional) In Steps, outline the plan: navigate to the cart URL, click Proceed to Checkout, fill shipping/payment fields from the Vault, and submit the order.
-
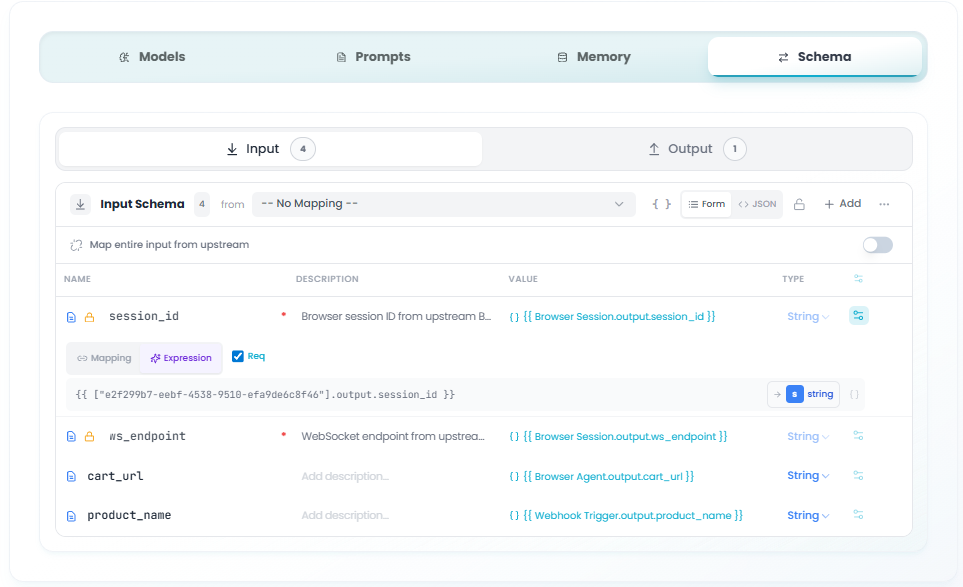
On the Schema tab → Input, define
cart_url(mapped from Browser Agent 1 → output → cart_url) andproduct_name(from Webhook Trigger → output → product_name). On Output, defineraw_order_datato capture the order-confirmation summary.
- Click Apply.
⚠ Data accuracy. The final transaction depends on the accuracy of the credentials and shipping details stored in the Vault.
✅ Verify: the second Browser Agent is connected to the Router's proceed path and re-uses the persistent session.
Step 7 — Save and publish
Goal: persist your work and promote it so it can be triggered. (~2 min)
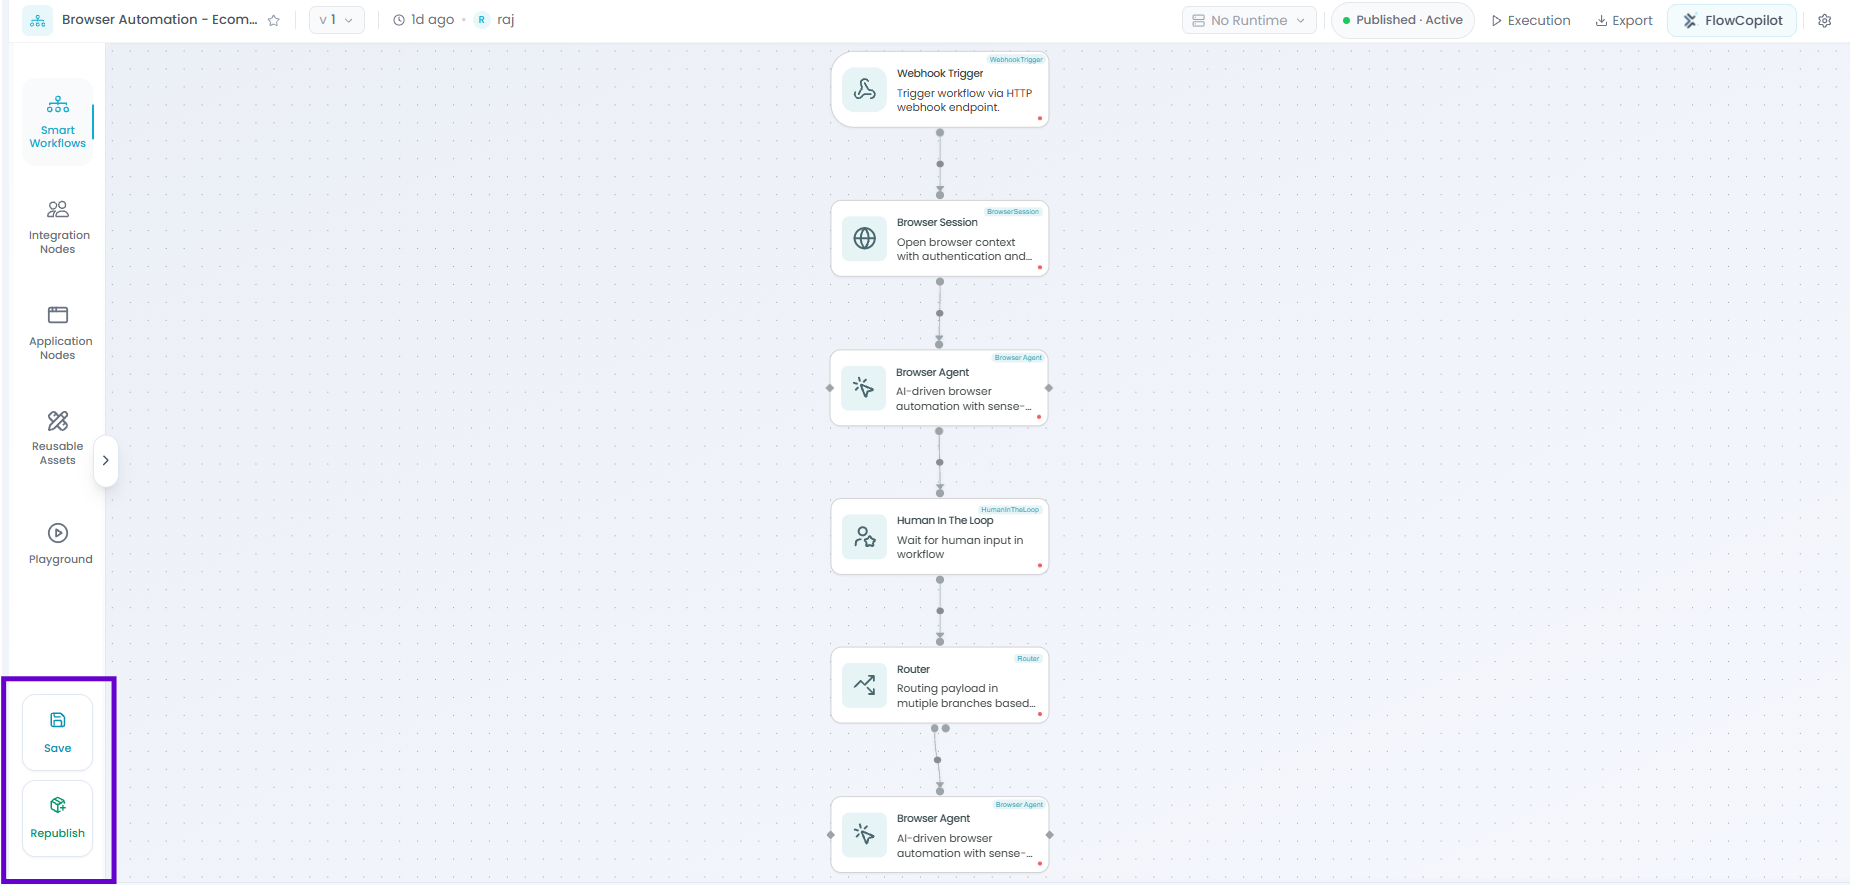
- Click Save (bottom-left of the canvas) — the workflow is saved as a draft.
- Click Publish (or Republish on later edits).
- Wait for the success toast: "Workflow published successfully."
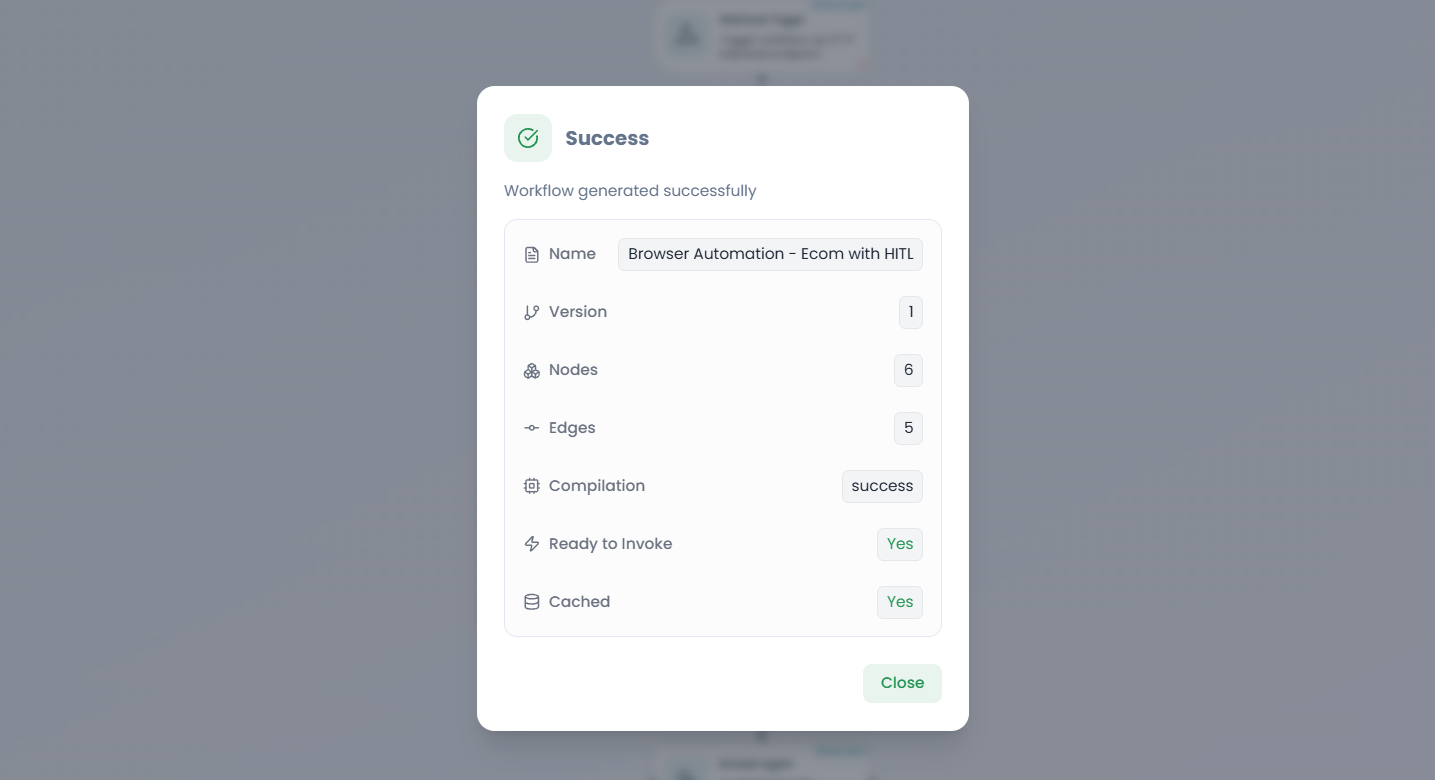
⚠ Always re-publish after edits. Saved-but-unpublished changes won't run when the webhook fires. If the workflow looks correct but isn't executing, confirm the latest version is published.
✅ Verify: in the Smart Workflows list, your workflow shows status Active with a recent timestamp.
Step 8 — Send a test request
Goal: fire a sample request and watch the agents reason and act. (~3 min)
- Open the Webhook Trigger node again and switch to test mode.
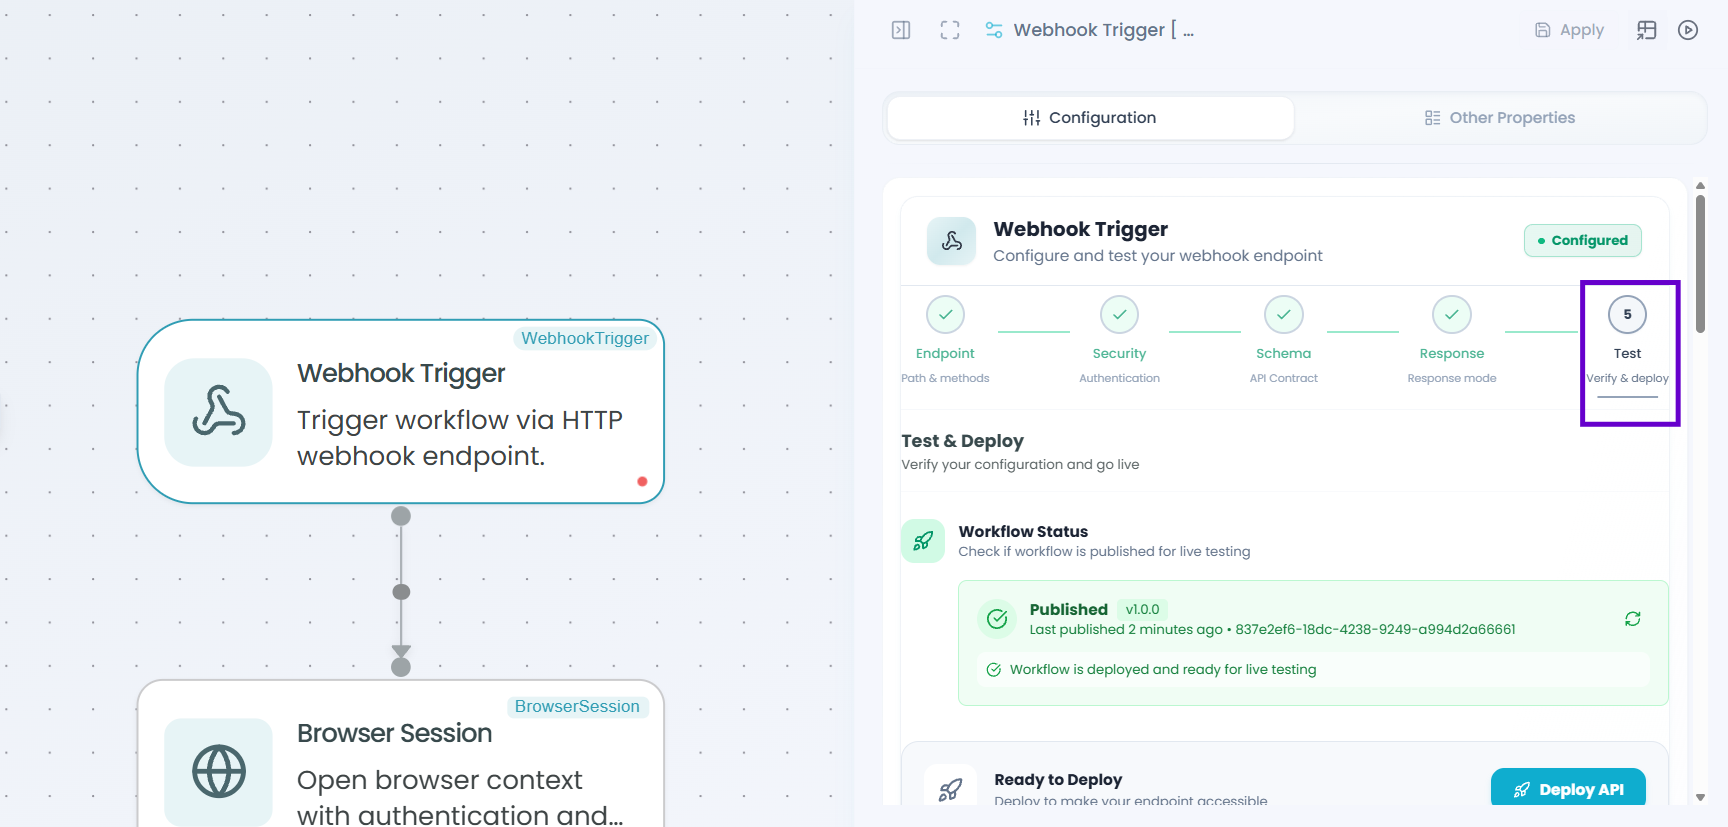
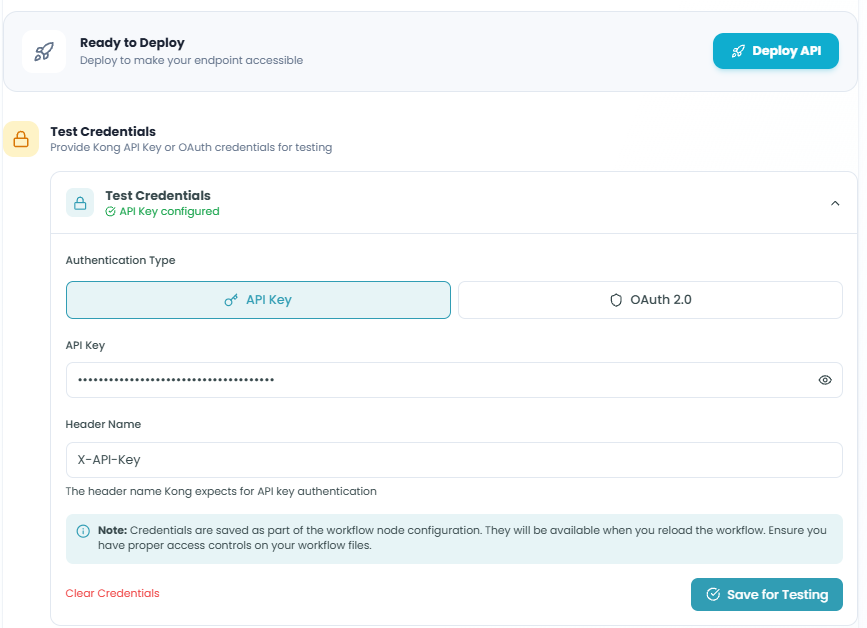
- Scroll to Deploy API and click it to expose the workflow as an API. In the Credentials section just below, attach a pre-configured API key to secure it, then click Save for Testing.
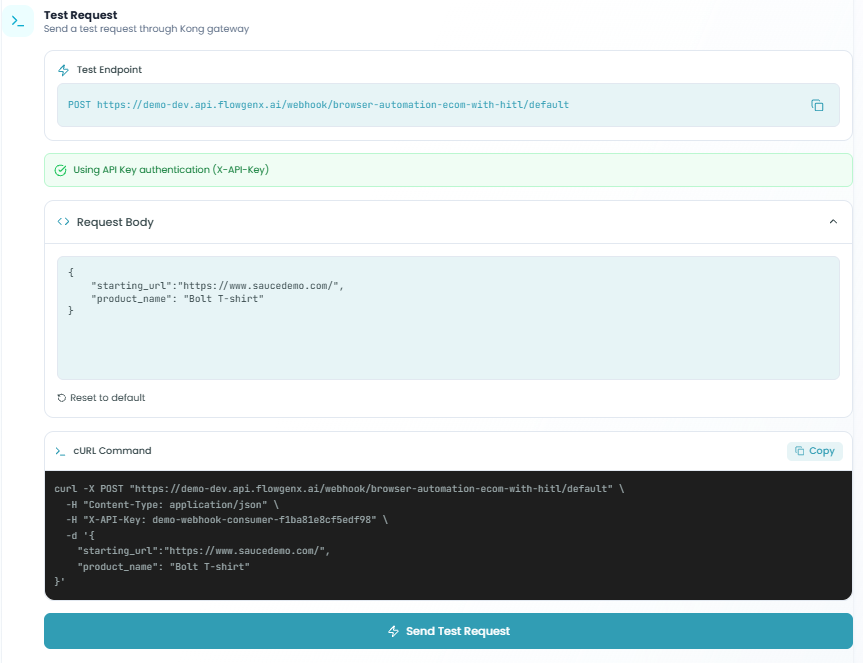
- In the Test Request section, fill the request body to match your schema (or copy the generated cURL), then click Send Test Request.
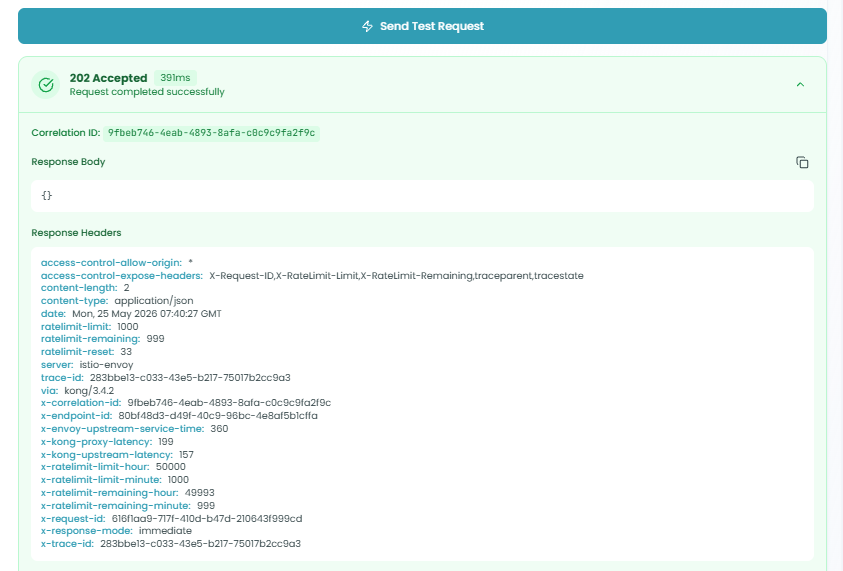
- After a moment you'll receive a success response.
Step 9 — Monitor the execution
Goal: review the run, trace the path, and inspect node-level inputs and outputs. (~2 min)
- Go to Monitor → Workflow Runs.
- Select your Web Automation workflow to see its execution history.
- Click the run ID for the test you just sent.
- Review the end-to-end trace — it spans every step and agent call, including
node_name,node_type, and the Router'srouting_path. - Click any node (Browser Agent, HITL, …) to see its captured Input and Output state. Failed nodes capture an
error_messageandstatusfor debugging.
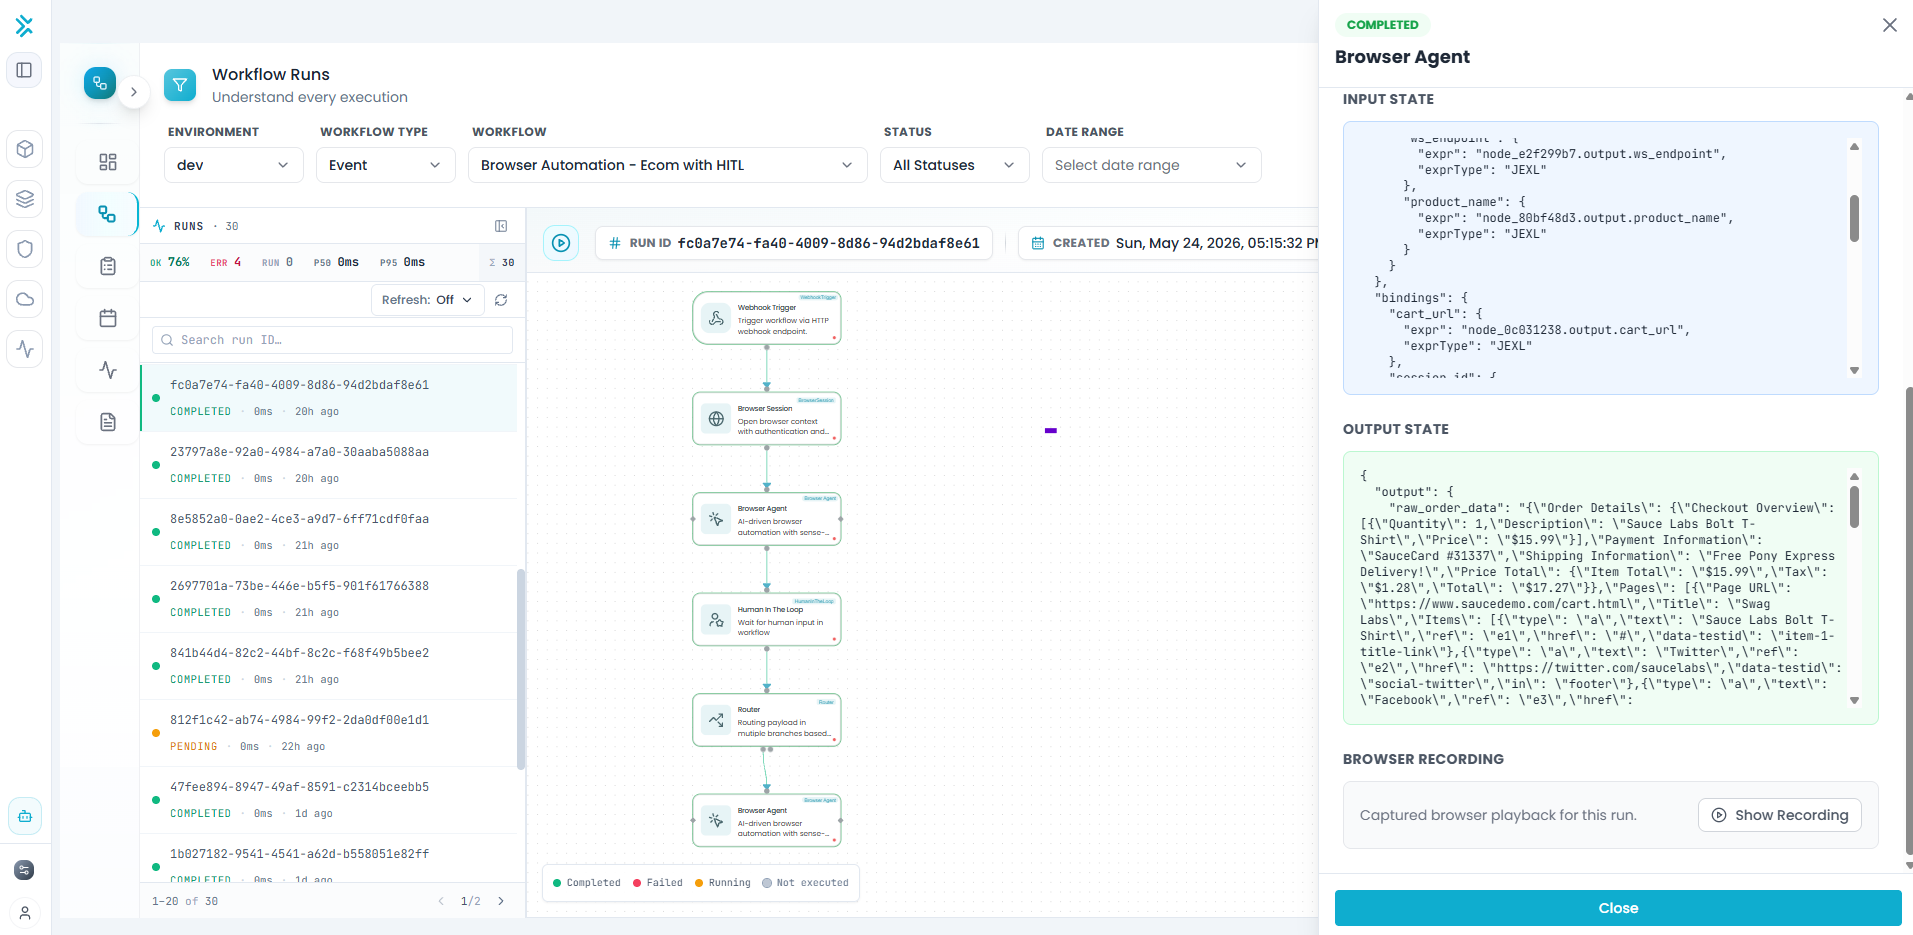
Tip — full observability. Every step is logged and traced, so you can inspect how JEXL expressions resolved — invaluable for debugging and post-mortems.
✅ Verify: you can drill into the Browser Agent nodes and see the cart_info and cart_url that were captured.
You're done — what's next
You've built, published, and tested an e-commerce automation with a Human-in-the-Loop review. Keep going:
- Introduction to Agents — React, Supervisor, and Swarm agent patterns.
- Human-in-the-Loop — deeper on approval steps, forms, and channels.
- Traceability — move from manual tests to full run observability.
Troubleshooting
| Symptom | Likely cause | Resolution |
|---|---|---|
| Agent node shows a red dot | Model not configured or invalid API key | Open the node → Models tab → verify the key and test the connection |
| Webhook returns 404 | Workflow not published, or published to a different environment | Click Republish; confirm the URL matches the environment you're calling |
| Run hangs at an agent step | LLM provider rate-limit or timeout | Check Monitor → Logs; lower max tokens or switch to a faster model |
| Run pauses indefinitely | Waiting on the HITL approval | Have the recipient complete and submit the emailed form |
Compliance & Access Control
Configure IP restrictions, time-based access, and generate compliance reports for regulatory requirements
Omnichannel Support Ticket Triage with AI Routing
Triage support tickets from Zendesk and HubSpot — classify intent and sentiment with a ReAct Agent, reply on the right CRM, and notify the owning developer in Google Chat.