

Omnichannel Support Ticket Triage with AI Routing
Triage support tickets from Zendesk and HubSpot — classify intent and sentiment with a ReAct Agent, reply on the right CRM, and notify the owning developer in Google Chat.
Automatically triage support tickets from Zendesk and HubSpot: a ReAct Agent classifies intent and sentiment, a second agent posts a reply to the correct CRM, and a third notifies the owning developer in Google Chat — all from one workflow.
What you'll build
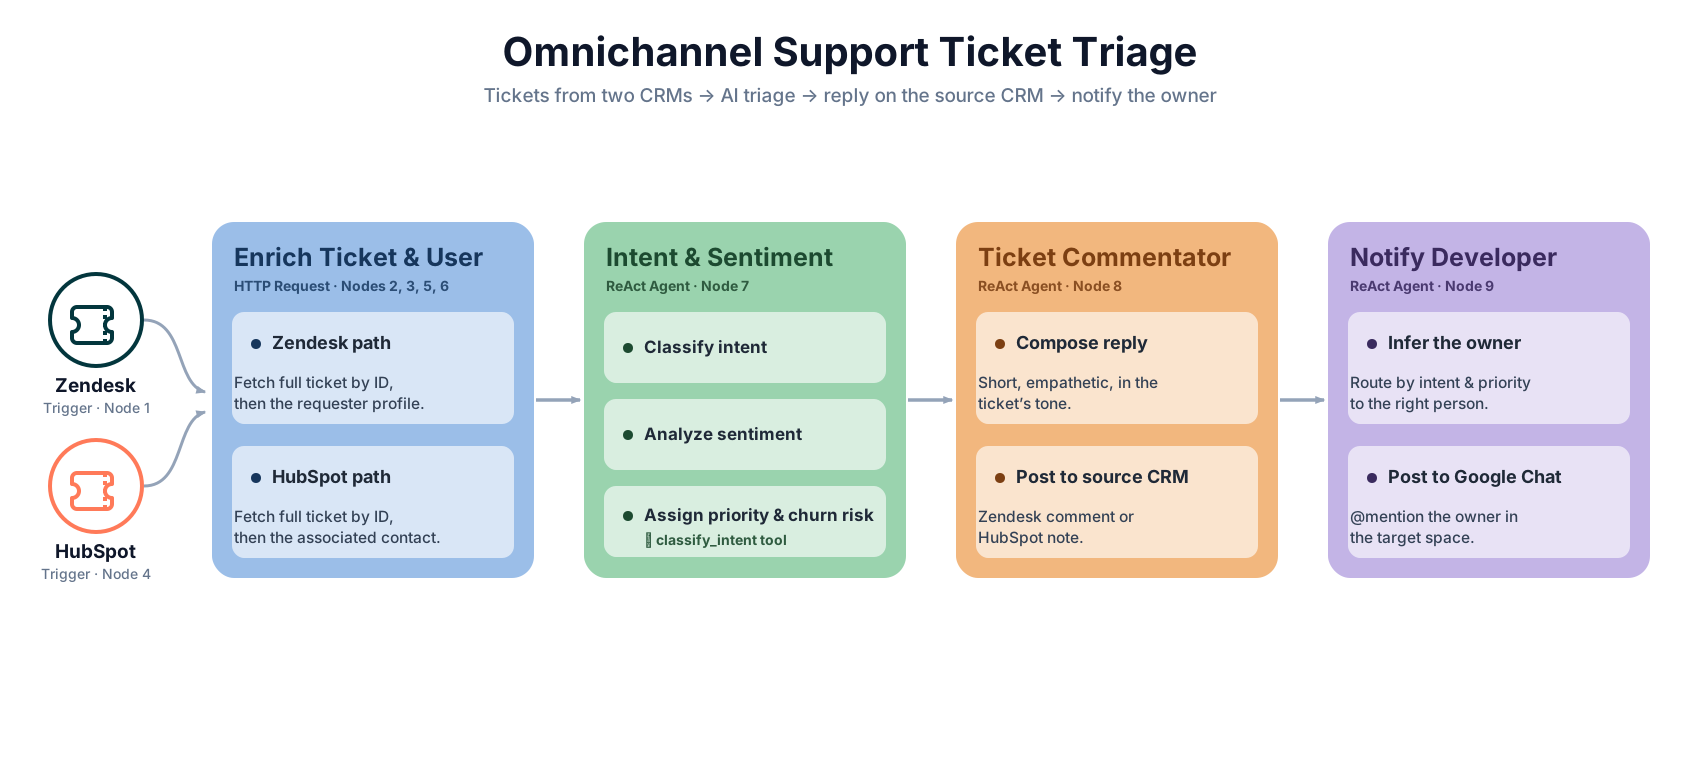
An always-on workflow with two ingestion paths (Zendesk + HubSpot) that converge into an AI triage → reply → notify pipeline.
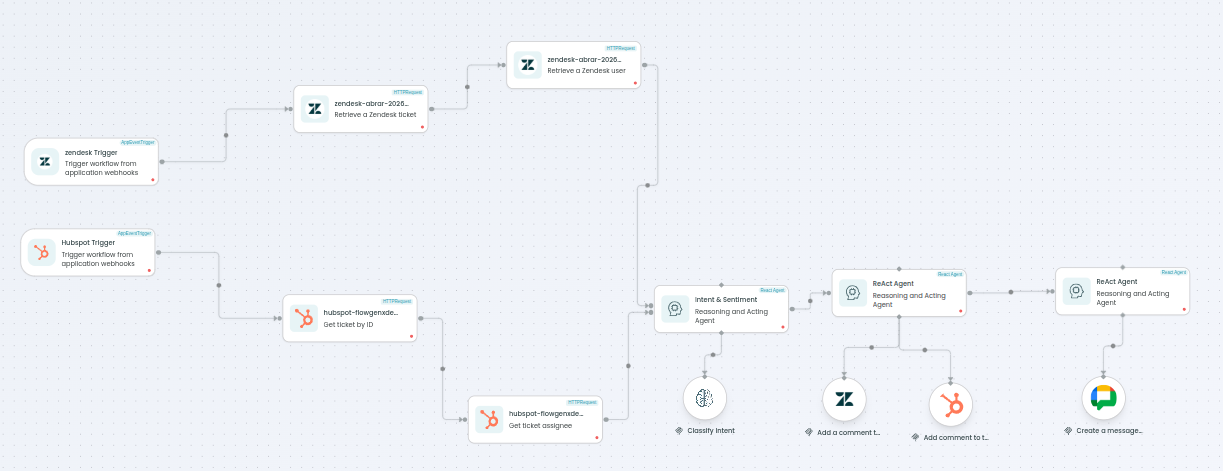
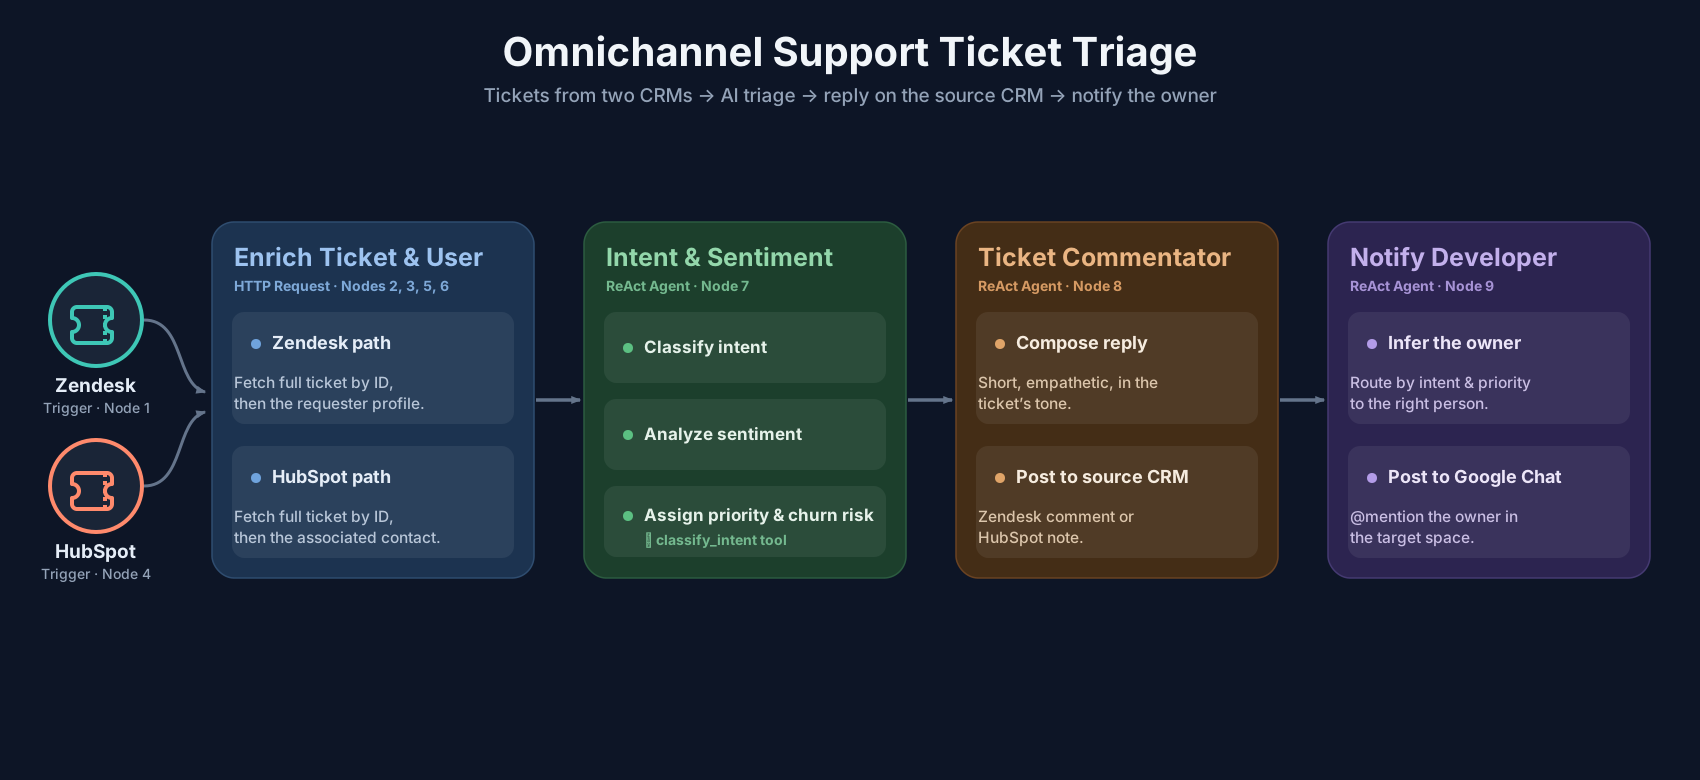
Architecture at a glance
| # | Node | Type | Purpose |
|---|---|---|---|
| 1 | Zendesk Trigger | App Event Trigger | Fires when a Zendesk ticket is created or updated |
| 2 | Zendesk Ticket Details | HTTP Request | Fetches the full Zendesk ticket by ID |
| 3 | Zendesk User Details | HTTP Request | Retrieves the Zendesk requester / assignee profile |
| 4 | HubSpot Trigger | App Event Trigger | Fires when a HubSpot ticket is created or updated |
| 5 | HubSpot Ticket Details | HTTP Request | Fetches the full HubSpot ticket by ID |
| 6 | HubSpot User Details | HTTP Request | Retrieves the HubSpot contact for the ticket |
| 7 | Intent & Sentiment | ReAct Agent | Classifies intent, sentiment, priority, churn risk |
| 8 | Ticket Commentator | ReAct Agent | Writes a reply and posts to Zendesk and/or HubSpot |
| 9 | Notify Developer | ReAct Agent | Sends a routed notification to Google Chat |
Before you begin
- A FlowGenX account with access to Design → Flow Designer → Workflow Canvas.
- Zendesk and HubSpot connectors authorized (API token / OAuth).
- An LLM provider API key (OpenAI, Anthropic, Gemini) for the ReAct agents.
- A Google Chat connector authorized, with access to the target space.
First time on the platform? Start with the Platform Tour quickstart — it covers navigation, the left-hand menu, and where to find Workflow Canvas, Integration Studio, and the Playground.
Step 1 — Add the Zendesk & HubSpot triggers
Goal: set up the two entry points that subscribe to ticket events from each platform. (~4 min)
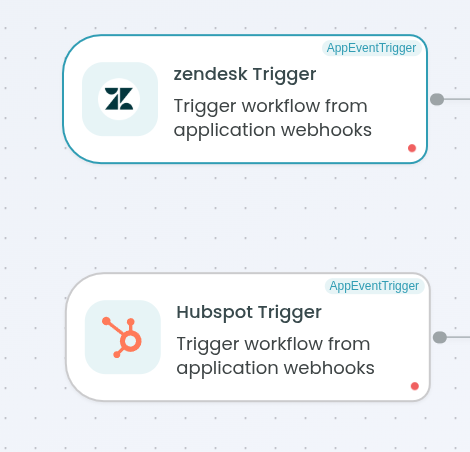
- Drag an App Event Trigger onto the canvas and select Zendesk as the application.
- Under Credentials / Auth, select your Zendesk connector and add its API key to authenticate the subscription.
- Choose the ticket event(s) to subscribe to (e.g.
ticket.created,ticket.updated), then apply. - Drag a second App Event Trigger and repeat for HubSpot, subscribing to its ticket events.
- Switch each trigger to Listen / test mode and create a test ticket on each platform to confirm a live event arrives.
Step 2 — Fetch ticket details with HTTP Request
Goal: retrieve the full ticket record — subject, body, priority, tags — from each platform's API. (~4 min)
- Drag an HTTP Request node after the Zendesk trigger and connect the edges.
- Configure it to call
GET /api/v2/tickets/{ticket_id}, mappingticket_idfrom the trigger event with a JEXL expression. - Add your Zendesk auth in the headers, then click Apply.
- Drag a second HTTP Request after the HubSpot trigger, calling
GET /crm/v3/objects/tickets/{ticket_id}. - Map the HubSpot ticket ID from its trigger event, add HubSpot auth, then click Apply.
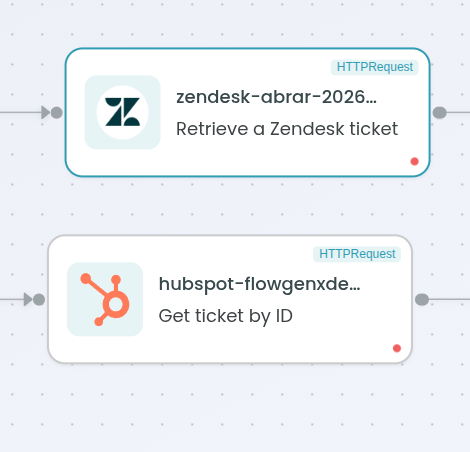
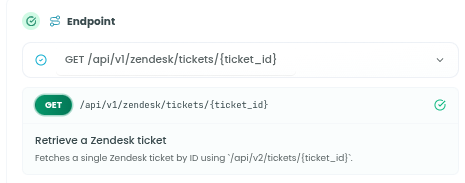
Tip — key fields to capture. Zendesk returns subject, description, priority, status, tags; HubSpot returns subject, content, hs_ticket_priority, hs_pipeline_stage. The agents use these downstream.
✅ Verify: a test run returns the complete ticket object (subject and body included) in each HTTP node's output.
Step 3 — Fetch the requester's user profile
Goal: look up the person who submitted or is assigned to the ticket so the reply can be personalized. (~3 min)
- Drag an HTTP Request node after the Zendesk ticket-details node and connect the edges.
- Call
GET /api/v2/users/{user_id}, mappingrequester_idfrom the ticket-details output. - Repeat on the HubSpot path with
GET /crm/v3/objects/contacts/{contact_id}, mapping the contact ID from the ticket associations. - Add the matching auth headers on each node and apply.
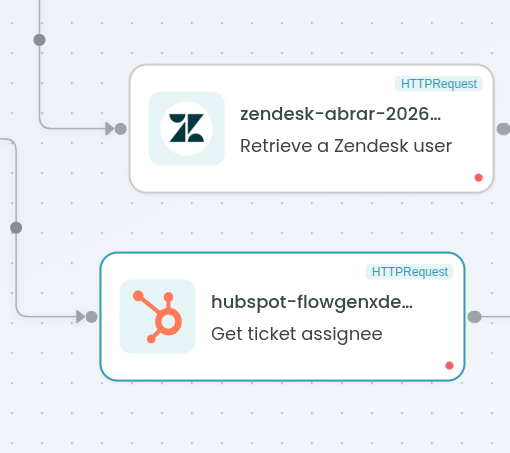
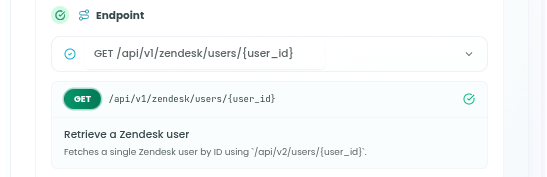
✅ Verify: a test run returns the requester's profile — name, email, organization — in the node output.
Step 4 — Configure the Intent & Sentiment ReAct Agent
Goal: classify the ticket and assign a priority — forcing a mandatory classify_intent tool call first. (~7 min)
- Drag a ReAct Agent onto the canvas after the HTTP nodes, and connect both paths (Zendesk and HubSpot) into it so they converge here.
- Under Models → LLM Model, choose or create a model.
- Under Tools, attach the
classify_intenttool so the agent returns a structured classification. - Under Prompts, paste a system prompt that forces the tool call first (see below).
- Under Schema → Input, define
zendesk_subject,zendesk_description,hubspot_subject,hubspot_descriptionand map them from the HTTP outputs (leave the unused platform's fields empty). - Under Schema → Output, define the JSON fields the agent returns (see below), then click Apply.
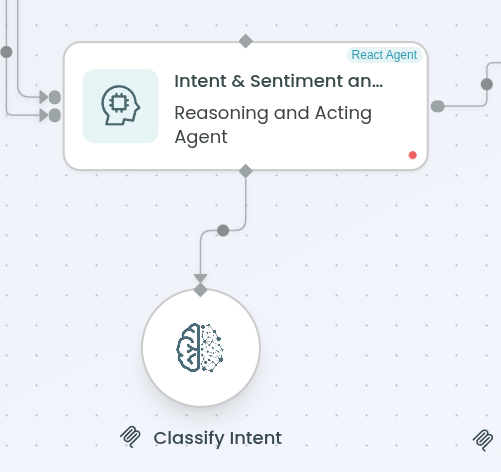
System prompt — mandatory tool call (excerpt):
STEP 0 — MANDATORY: Call classify_intent before any analysis. No exceptions.
STEP A — Analyze: intent, sentiment, churn_risk, urgency_signals, error_codes,
         affected_features, summary, source.
STEP B — Priority (evaluated most-critical first):
  P0  outage / security_incident / legal / contract signals
  P1  churn_risk=true | angry or panicked | executive escalation
  P2  bug / billing / account_access (no P0–P1 trigger)
  P3  feature_request, single user
  P4  how_to, informational
No CRM/telemetry connected — score from ticket text only; say so in reasoning.
Output JSON schema:
{
  "intent": "bug_report | feature_request | billing | ...",
  "confidence": 0.0,
  "sentiment": "calm | frustrated | angry | urgent_panicked",
  "churn_risk": false,
  "urgency_signals": ["exact phrase from ticket"],
  "error_codes": ["codes found in ticket"],
  "product_hint": "product name or null",
  "affected_features": ["feature names"],
  "summary": "25-word max summary",
  "source": "zendesk | hubspot | both",
  "priority": "P0 | P1 | P2 | P3 | P4",
  "reasoning": "brief explanation of priority"
}
Intent categories:
| Intent | Category | Description |
|---|---|---|
bug_report | Bug / Error | A defect or unexpected behavior |
feature_request | Improvement | Request for new functionality |
billing | Financial | Billing errors, invoice disputes, charges |
account_access | Auth | Can't log in, password reset, locked account |
how_to | Informational | How-to or onboarding guidance |
outage_report | Critical | Platform outage or service unavailability |
security_incident | Critical | Data breach, unauthorized access, threat |
churn_risk | Retention | Signaling intent to cancel or leave |
other | General | Doesn't fit any category above |
Priority matrix:
| Priority | Trigger |
|---|---|
| P0 — Critical | Outage, security incident, legal or contract signals |
| P1 — High | churn_risk=true, angry / panicked sentiment, executive escalation |
| P2 — Medium | Bug, billing, account access — no P0/P1 trigger |
| P3 — Low | Feature request from a single user |
| P4 — Minimal | How-to, informational questions |
⚠ Map only the populated source. A given ticket comes from one platform; leave the other platform's input fields empty. The agent sets source from whichever fields are present.
✅ Verify: a test ticket returns the full JSON with intent, priority, and a reasoning string.
Step 5 — Configure the Ticket Commentator ReAct Agent
Goal: compose a customer reply and post it to the correct CRM with source-based routing. (~6 min)
-
Drag a ReAct Agent after the Intent & Sentiment agent and connect the edges.
-
Under Tools, attach both comment tools: Add a comment to a Zendesk ticket and Add comment to ticket (HubSpot).
-
Under Schema → Input, define
source,intent,sentiment,priority,summary,customer_signals,reasoning,zendesk_ticket,hubspot_ticketand map them from the previous agent and the triggers. -
Under Prompts, paste a reply-writing prompt with the routing logic:
source = zendesk→ post the reply only to the Zendesk ticket.source = hubspot→ post the reply only to the HubSpot ticket.source = both→ post to both platforms using their respective ticket IDs.
-
Under Schema → Output, define the confirmation JSON, then click Apply.
Reply-writing rules: max 3–5 sentences; tone follows sentiment (angry/panicked = extra empathy, calm = direct); P0/P1 use escalation language; address contract/churn/legal signals directly; no jargon or placeholders like [NAME]; always end with a clear next step or ETA.
{
  "reply_body": "The composed customer reply text",
  "source": "zendesk | hubspot | both",
  "zendesk_comment_posted": true,
  "hubspot_comment_posted": false,
  "suggested_status": "open | pending | solved | closed"
}
⚠ HubSpot comment association. HubSpot ticket comments are created as Notes associated to the ticket (association type 0-27 / definition 0-216). If the tool returns invalid from object type 0-46, the connector is sending the wrong object type — check the connector config.
✅ Verify: a source=zendesk ticket shows the comment in Zendesk; source=both posts to both, reflected by the two boolean flags.
Step 6 — Configure the Notify Developer ReAct Agent
Goal: infer the issue owner from the reply and post a routed message to Google Chat. (~5 min)
- Drag a ReAct Agent after the Ticket Commentator and connect the edges.
- Under Tools, attach Create a message in a space — the agent's only tool.
- Under Schema → Input, define
source,suggested_status,zendesk_ticket,hubspot_ticket,reply_bodymapped from the previous agent. - Under Prompts, paste a prompt that infers the owner from
reply_body, forces the tool call, and targets your Google Chat space. - Under Schema → Output, define the success / failure JSON, then click Apply.
Owner routing table (customize the mentions to your team):
| Issue type | Mention | Responsibility |
|---|---|---|
workflow | @… | Automation workflow logic / node routing |
hitl | @… | Tickets needing manual human review |
io | @… | Data input/output and integration problems |
http node | @… | API call failures, timeouts, bad responses |
knowledgebase | @… | KB content gaps or retrieval failures |
unclear | LLM decides | No mention match; no owner assigned |
Message format:
Hey <@mention>, there is a new ticket in <zendesk|hubspot|both> — can you look into it?
Ticket: <#id | Zendesk #X & HubSpot #Y for both>
Issue:  <one-line summary from reply_body>
Status: <suggested_status>
⚠ Force the tool call. Make the prompt explicit: the agent MUST call Create a message in a space before returning any output. Otherwise a ReAct agent may answer in text and skip the post entirely.
Step 7 — Save and publish
Goal: persist your work and promote it so the triggers can fire it. (~2 min)
- Click Save (bottom-left of the canvas) — the workflow is saved as a draft.
- Click Publish (or Republish on later edits).
- Wait for the success toast: "Workflow published successfully."
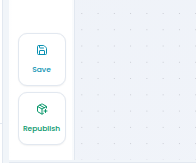
⚠ Always re-publish after edits. Saved-but-unpublished changes won't run when an event fires. If the workflow looks correct but isn't executing, confirm the latest version is published.
Step 8 — Trigger and test with a real ticket
Goal: create a ticket on each platform and watch the agents reason and act. (~3 min)
- Create a test ticket in Zendesk with a clear subject and body (e.g. a billing question).
- Confirm the Zendesk trigger fires, both HTTP nodes enrich the ticket, and the Intent & Sentiment agent calls
classify_intent. - Confirm the Ticket Commentator posts a reply on the Zendesk ticket and the Notify Developer agent posts to Google Chat.
- Repeat with a HubSpot ticket to verify the second ingestion path end-to-end.

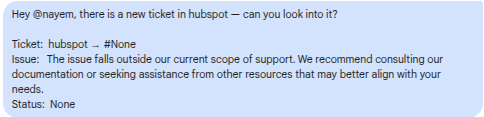
Tip — test multiple intents. Send one calm how_to (expect P4) and one outage_report or angry churn signal (expect P0/P1) to verify priority and owner routing both behave.
Step 9 — Monitor the execution
Goal: review run history, trace the path, and inspect node-level inputs and outputs. (~2 min)
- Go to Monitor → Workflow Runs.
- Select your omnichannel triage workflow to see its execution history.
- Click the run ID for the test you just executed.
- Review the end-to-end trace —
node_name,node_type, and each node's captured input/output. - Click the Intent & Sentiment agent to confirm
classify_intentran and the priority resolved as expected.
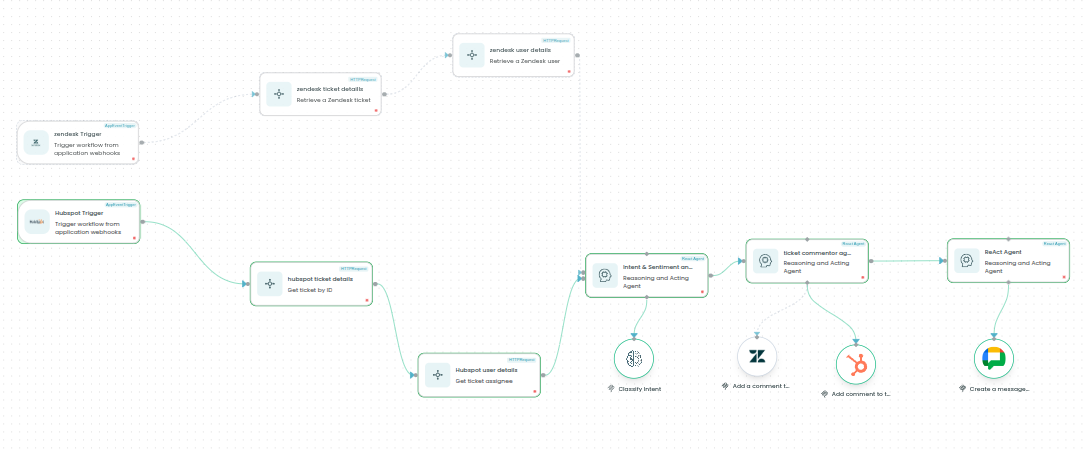
✅ Verify: you can drill into each ReAct Agent to view its structured output — the classification JSON and the posted reply.
You're done — what's next
You've built an omnichannel support workflow that triages tickets from two platforms, replies on the right CRM, and notifies the owning developer. Keep going:
- Introduction to Agents — React, Supervisor, and Swarm patterns.
- Human-in-the-Loop — add approval steps between agents.
- Traceability — full run observability.
Troubleshooting
| Symptom | Likely cause | Resolution |
|---|---|---|
| Agent node shows a red dot | Model not configured or invalid API key | Open the node → Models → verify the key and test the connection |
| Agent inputs are all empty / null | JEXL expression not bound to upstream output | Open the agent's input schema and re-map each field from the correct node |
classify_intent never called | Prompt doesn't force the tool call | Add an explicit "STEP 0 — MANDATORY" instruction to call the tool first |
HubSpot comment fails (0-46 error) | Connector sends wrong object type | Comment must be a Note (type 0-27); fix the connector or call the Notes API |
| No Google Chat message posted | Notify agent answered in text only | Force the tool call; confirm the Google Chat connector is authorized |
| Trigger never fires | Event subscription inactive or not published | Re-check the connector subscription and click Republish |
Glossary
- App Event Trigger — an entry point that subscribes to events from an app (Zendesk, HubSpot) and starts the workflow when an event arrives.
- HTTP Request — a node that calls an external REST API to fetch or send data (here, ticket and user details).
- ReAct Agent — a Reasoning-and-Acting agent that calls tools to take real actions while it works through a task.
classify_intent— the tool the Intent & Sentiment agent calls to return a structured intent / sentiment / priority classification.- Source routing — logic that posts a reply to Zendesk, HubSpot, or both based on the ticket's origin.
Web Automation — E-commerce Checkout with Human Review
Build a browser-automation workflow that searches, carts, and checks out on an e-commerce site — with a Human-in-the-Loop approval before payment.
Slack Help Desk — AI Query Resolution with Smart Escalation
Answer employee questions from your documentation with a Deep Agent and semantic search — and escalate to a developer meeting (Slack + Gmail + Google Meet) only when the docs fall short.