

Patient Health Data Processing
Ingest patient records, validate clinical ranges, recompute BMI and metabolic risk with NLP-Tune code generation, then branch into anonymized ML-ready data and risk-based patient segments written to PostgreSQL and S3.
Turn a raw patient dataset into two clean, purpose-built outputs. This pipeline loads patient records, filters out invalid clinical values, uses NLP-Tune to generate Python/Pandas that recomputes BMI and a metabolic risk score, then splits into two branches: one produces anonymized, ML-ready data, the other performs feature engineering, risk scoring, and patient segmentation. Outputs land in both PostgreSQL and S3.
To start, create a new Event workflow (e.g. Patient_Health_Data_Processing) in the DEV environment from Design → Flow Designer → Workflow Canvas, then follow the steps below.
What you'll build
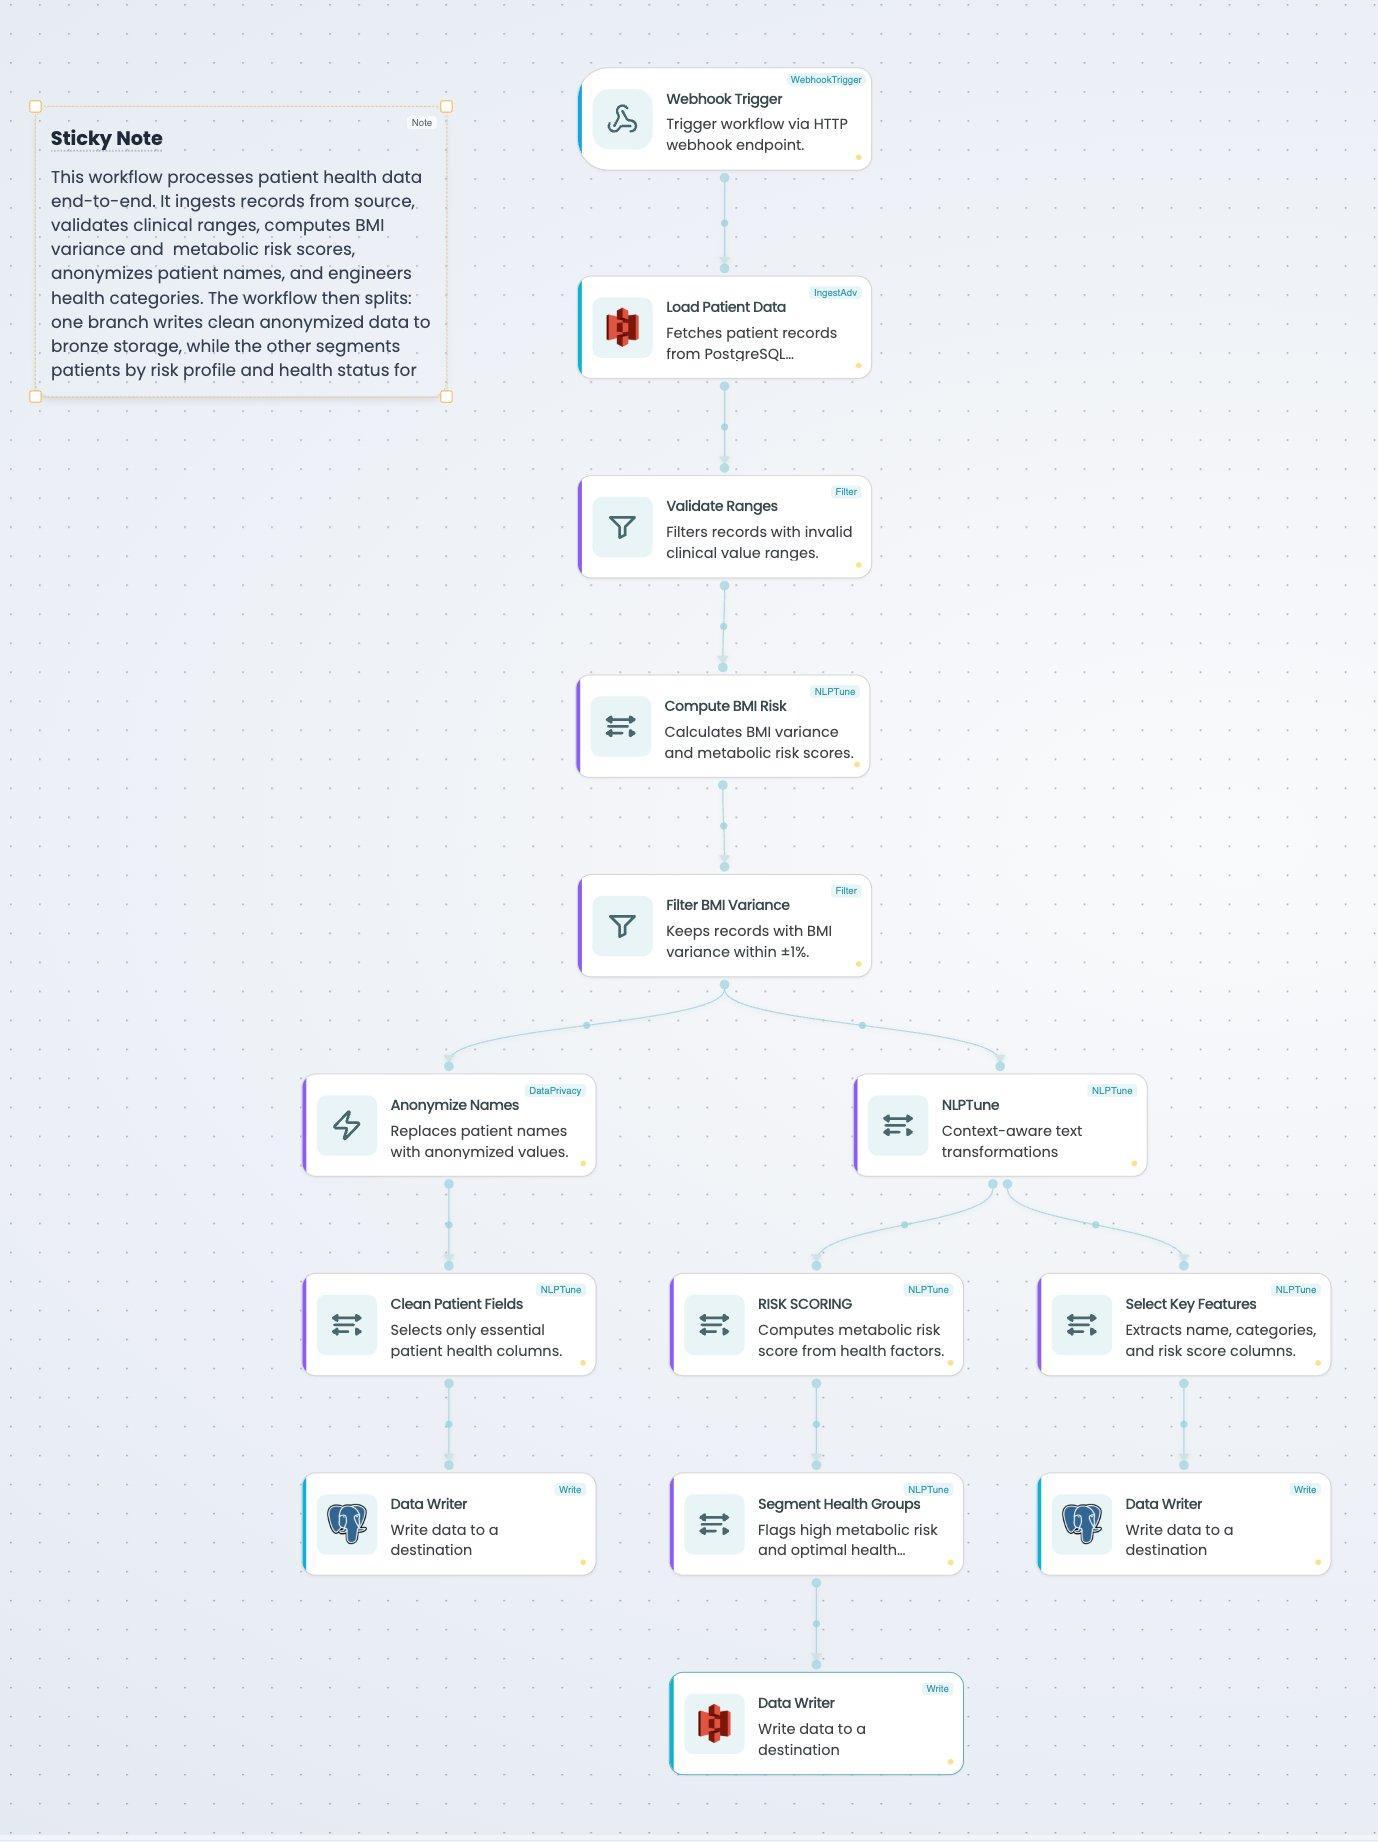
Architecture at a glance
The pipeline is a trunk that splits into branches:
- Trunk — Webhook Trigger → Load Patient Data (IngestAdv) → Validate Ranges (Filter) → Compute BMI Risk (NLP-Tune) → Filter BMI Variance (Filter, ±1%).
- Branch A — anonymized, ML-ready data — Anonymize Names (Data Privacy) → Clean Patient Fields (NLP-Tune) → Data Writer (PostgreSQL).
- Branch B — feature engineering, scoring & segmentation — Feature Engineering (NLP-Tune) adds category columns, then splits again:
- Path B1 — Risk Scoring → Segment Health Groups → Data Writer (S3).
- Path B2 — Select Key Features → Data Writer (PostgreSQL).
What you'll learn
- Load records with the Load Patient Data (IngestAdv) source node.
- Enforce valid clinical ranges with a nested AND Filter Builder.
- Generate Python/Pandas with the NLP-Tune Natural-Language Code Generation node.
- Mask PII with the Data Privacy node using a fixed random seed.
- Branch a workflow into parallel paths and write outputs to both PostgreSQL and S3 with Data Writer nodes.
Before you begin
- A FlowGenX account with access to Design → Flow Designer → Workflow Canvas.
- An LLM provider API key (OpenAI, Anthropic, Gemini) — NLP-Tune uses it to generate code.
- A patient-records source — either a PostgreSQL table or an S3 CSV (this guide's reference uses an S3
new_health.csv). - A destination PostgreSQL database/table for the ML-ready and feature outputs.
- An S3 bucket (with credentials) for the segmentation output.
⚠ Pick the right environment. DEV is for building and testing. Don't publish quickstart exercises to PROD — published PROD workflows trigger live integrations.
Step 1 — Add the Webhook Trigger
Goal: set up the workflow entry point that starts the pipeline over HTTP. (~2 min)
- Drag a Webhook Trigger onto the canvas and open its config panel.
- This is the same entry-point node used across the other Quickstarts — no special config needed to start.
- Click Apply.
✅ Verify: the node shows "Trigger workflow via HTTP webhook endpoint."
Step 2 — Load Patient Data (IngestAdv)
Goal: fetch patient records from your source into the workflow. (~3 min)
- Drag the Load Patient Data node (IngestAdv type) below the Webhook Trigger and connect the edge.
- In the config panel, set the source to your patient-records connection and select the dataset (e.g. an S3
new_health.csv, or your PostgreSQL patient table). - Run the node once and open the Output tab to preview the fetched rows (
Age,BMI,Name,Gender,Health,Smoker,Diabetes,Cholesterol,Height_(cm),Systolic_BP,Weight_(kg),Diastolic_BP). - Click Apply.
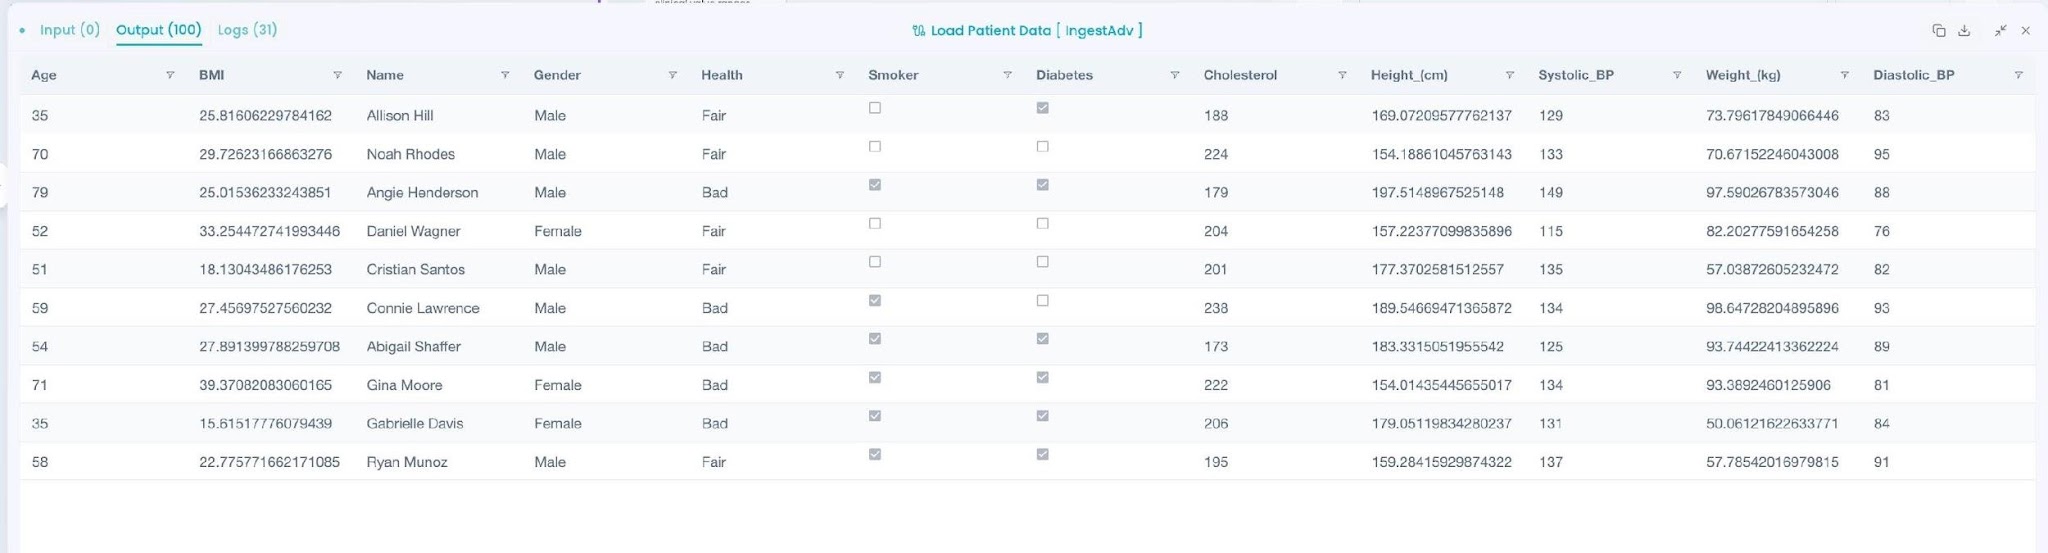
💡 Tip — preview before you build. Use the Output preview to confirm column names match what the downstream Filter and NLP-Tune nodes expect — especially Height_(cm) and Weight_(kg).
✅ Verify: the Output tab shows a non-zero row count with the expected patient columns.
Step 3 — Validate Ranges (Filter)
Goal: drop records whose clinical values fall outside valid ranges. (~4 min)
- Drag a Filter node (Validate Ranges) after Load Patient Data and connect the edge.
- Open the node → Configuration → Filter Builder.
- With a top-level AND group, add a nested AND group per clinical field:
Age > 0ANDAge < 100Systolic BP > 70ANDSystolic BP < 250Diastolic BP > 40ANDDiastolic BP < 150Cholesterol > 50ANDCholesterol < 500
- Click Apply.
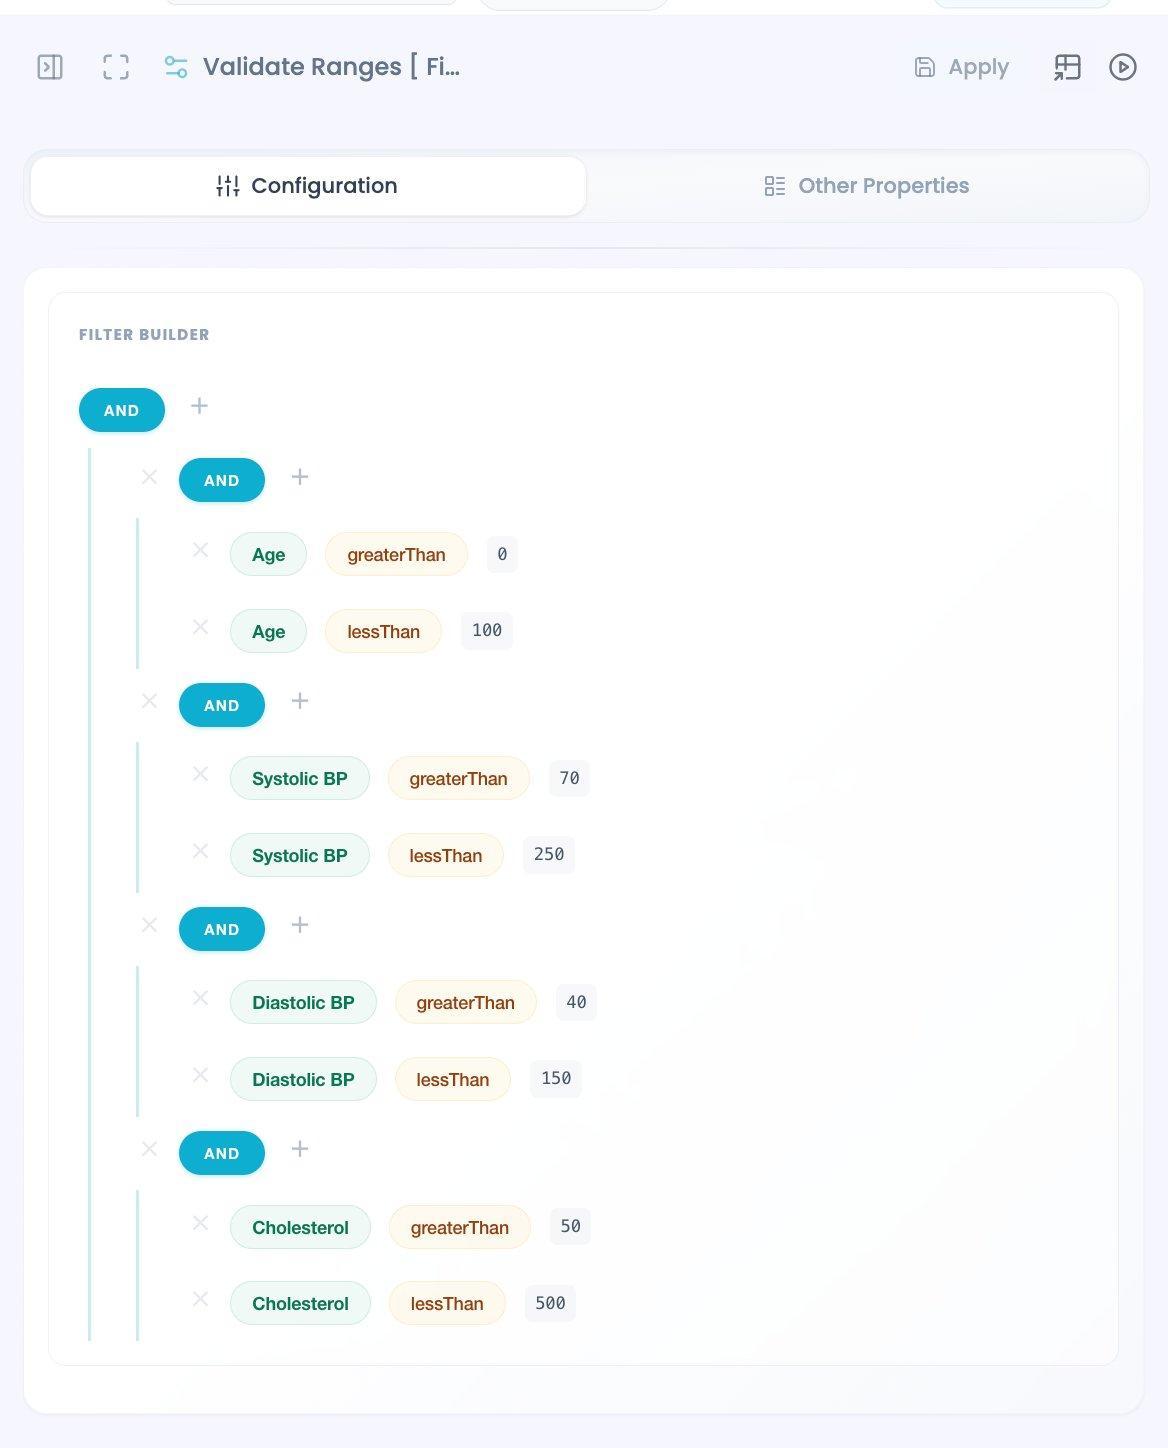
💡 Tip — group with nested AND blocks. Wrapping each field's min/max pair in its own AND group keeps the logic readable and makes it easy to add or remove a clinical rule later.
✅ Verify: the Filter Builder shows the four nested AND groups, and the node shows a green (configured) dot.
Step 4 — Compute BMI Risk (NLP-Tune)
Goal: generate Python/Pandas to recompute BMI and cross-check it against the stored value. (~5 min)
- Drag an NLP-Tune node (Compute BMI Risk) after Validate Ranges and connect the edge.
- Open the node and select the Code tab under NLP Transformation.
- In the "Describe what you want to generate" box, paste the prompt below and run it to generate the transformation.
- Review the generated code (it adds
BMI_realandBMI_variancecolumns), then save it to the node. - Click Apply.
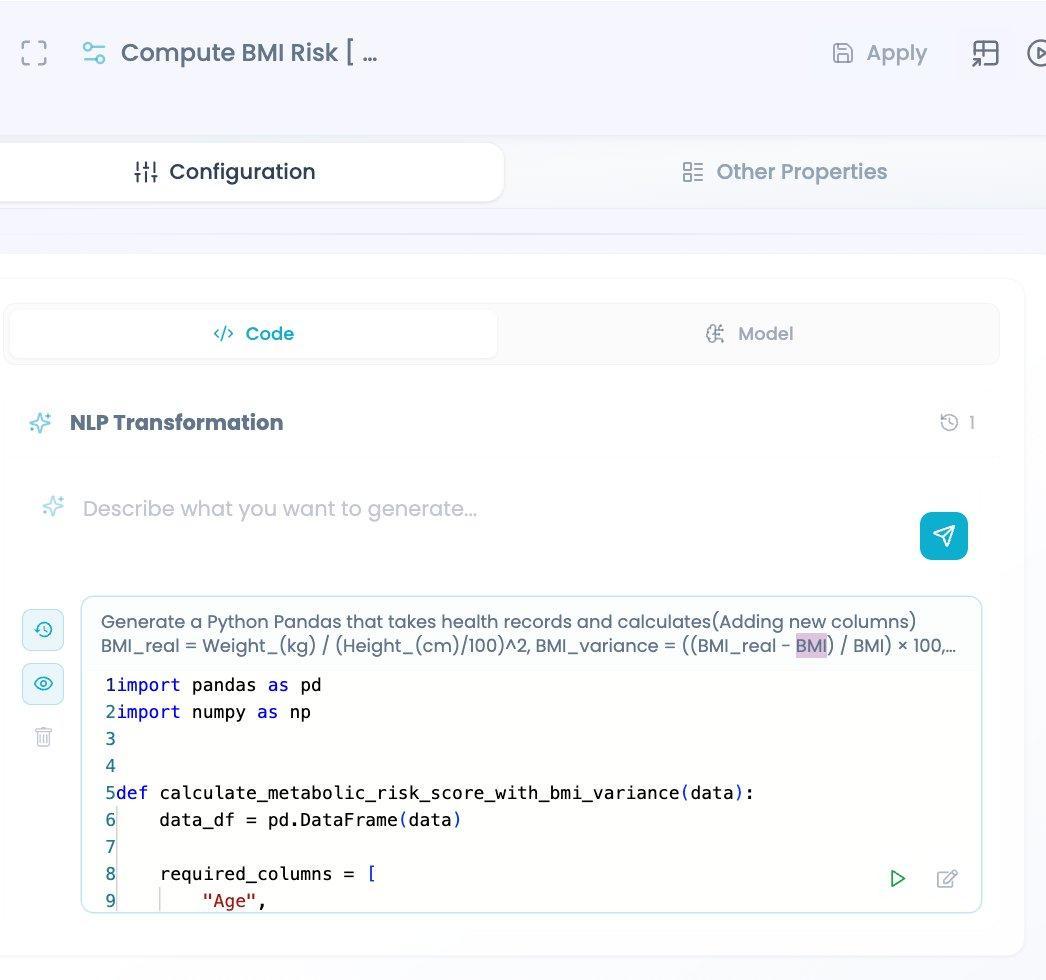
Generate a Python Pandas that takes health records and calculates (adding new
columns): BMI_real = Weight_(kg) / (Height_(cm)/100)^2, BMI_variance =
((BMI_real - BMI) / BMI) * 100, BP category from systolic/diastolic thresholds,
cholesterol category from cholesterol thresholds, and Metabolic_Risk_Score =
2*(Age>50) + 2*(BMI>=30) + 1*(Smoker) + 2*(BP_Category=Hypertension) +
1*(Cholesterol_Category=High) + 5*(Diabetes).
💡 Tip — why recompute BMI. Recomputing BMI from raw height and weight lets the next step catch records where the stored BMI is wrong by more than 1% — a common data-quality issue in clinical datasets.
✅ Verify: running the node adds BMI_real and BMI_variance to the output rows alongside the original columns.
Step 5 — Filter BMI Variance (Filter)
Goal: keep only records whose recomputed BMI is within ±1% of the stored value. (~2 min)
- Drag a Filter node (Filter BMI Variance) after Compute BMI Risk and connect the edge.
- Open the Filter Builder and add a single AND group:
BMI variance greaterThanOrEqual -1BMI variance lessThanOrEqual 1
- Click Apply.
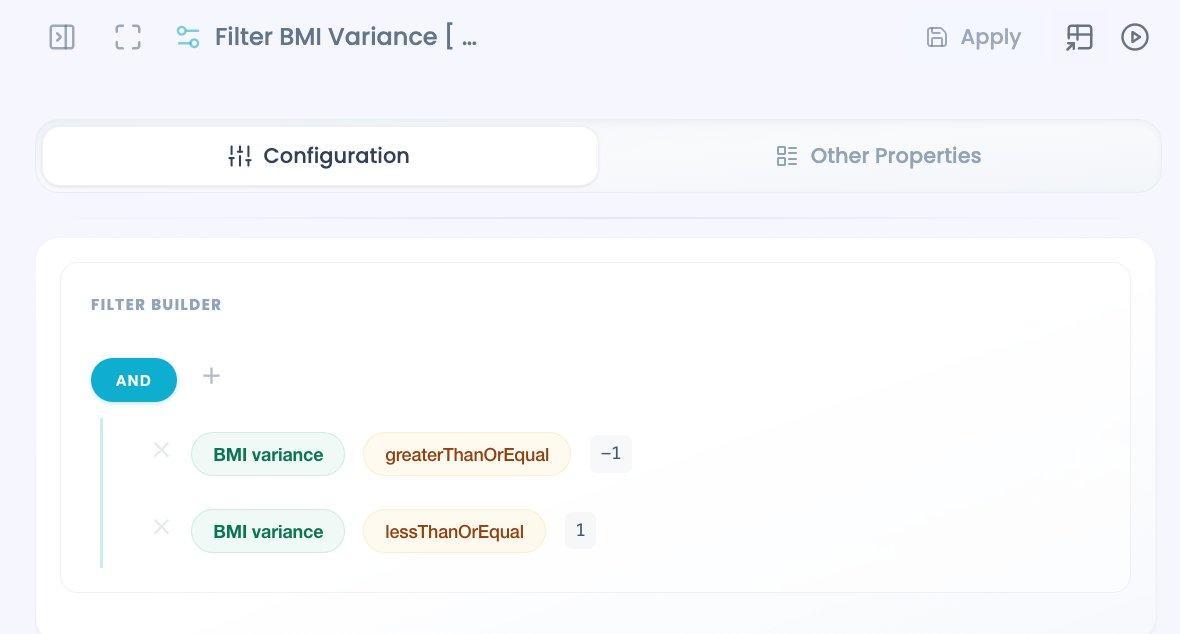
⚠ This is where bad records are removed. Records with BMI variance outside ±1% are dropped here. If downstream branches receive fewer rows than expected, confirm this threshold first.
✅ Verify: the Filter Builder shows both BMI variance conditions and a green dot. After this node the flow splits into two branches.
Branch A — Anonymized, ML-ready data
This branch produces clean, privacy-safe data for later machine-learning analysis.
Step 6 — Anonymize Names (Data Privacy)
Goal: mask patient names so the ML-ready dataset contains no direct PII. (~3 min)
- From the Filter BMI Variance node, drag a Data Privacy node (Anonymize Names) onto the first branch and connect the edge.
- Open the node → Privacy Rules and locate the
Namefield in the column list. - Set the
Namefield's action to mask (scramble/mask rule); leave other columns unset. - Set Random Seed to
42for reproducible masking across runs. - Click Apply.
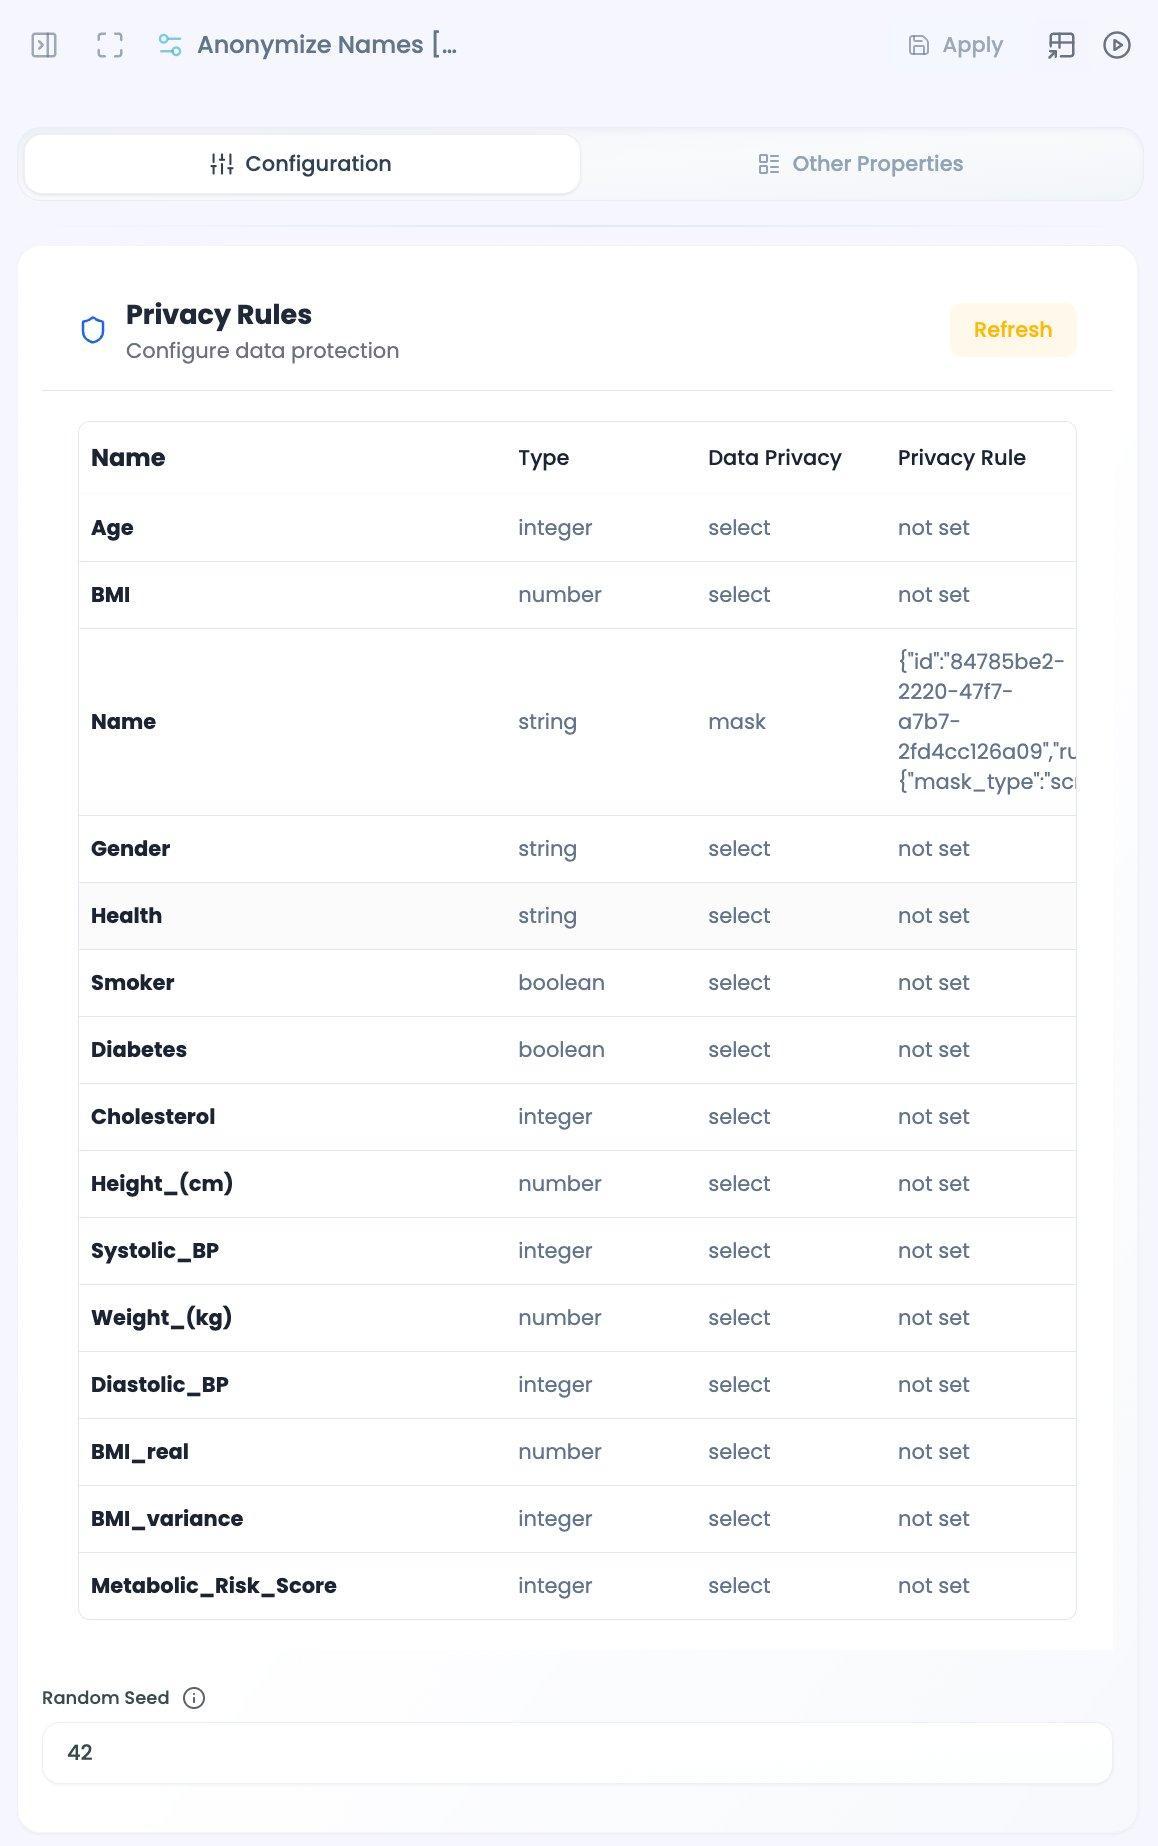
💡 Tip — fixed seed = reproducible runs. A fixed random seed ensures the same input name maps to the same masked value every run, keeping joins and ML experiments consistent.
✅ Verify: the Privacy Rules table shows a mask rule on the Name column; all other columns remain unchanged.
Step 7 — Clean Patient Fields (NLP-Tune)
Goal: keep only the essential patient health columns for the ML dataset. (~3 min)
- Drag an NLP-Tune node (Clean Patient Fields) after Anonymize Names and connect the edge.
- In the Code tab, paste the prompt below and run it.
- Review the generated Pandas (it selects the essential health columns and safely handles missing/duplicate columns) and save it.
- Click Apply.
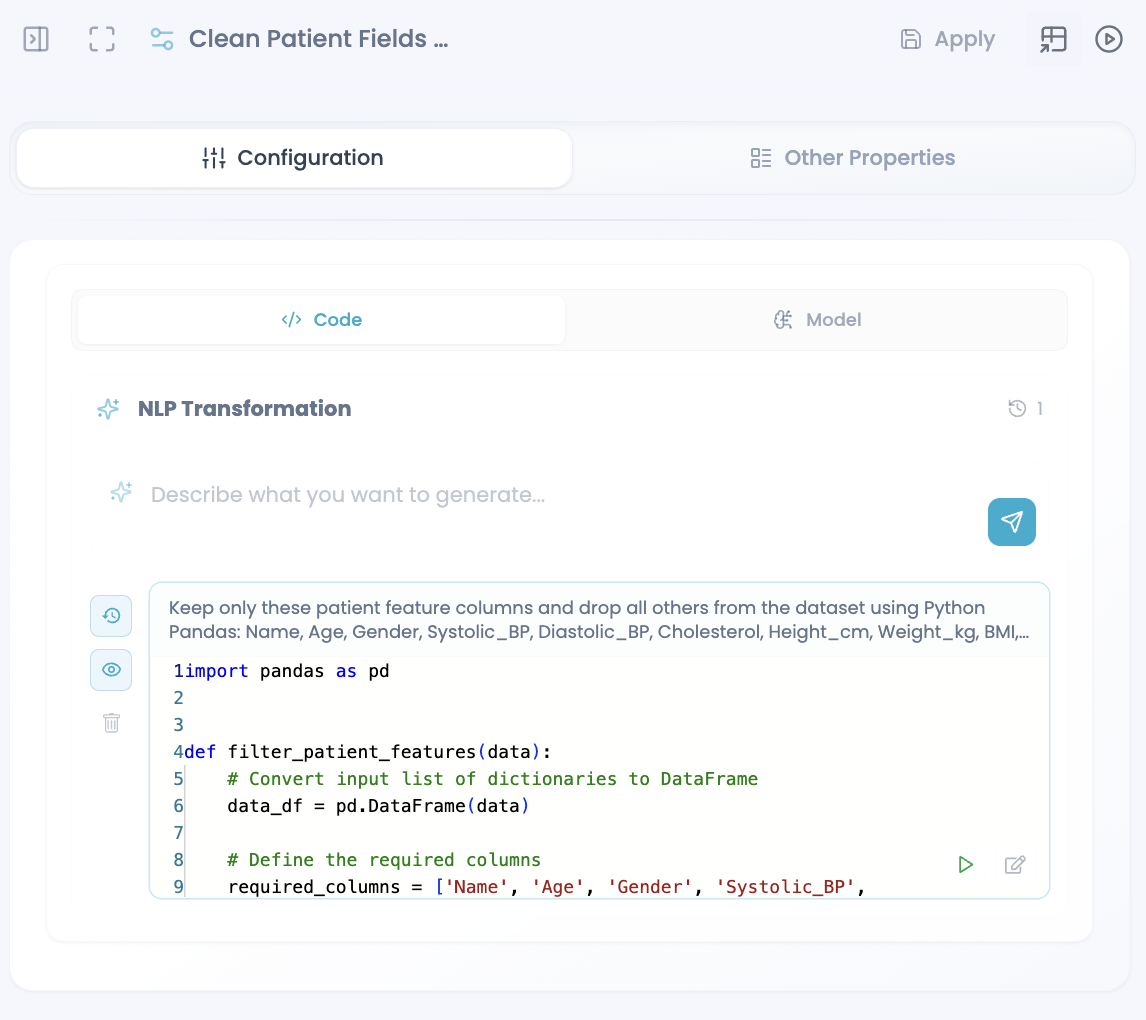
Keep only these patient feature columns and drop all others from the dataset
using Python Pandas: Name, Age, Gender, Systolic_BP, Diastolic_BP, Cholesterol,
Height_cm, Weight_kg, BMI, Smoker, Diabetes, Health, and BMI_Mismatch. First
convert the input list of dictionaries into a DataFrame, then safely check which
columns actually exist before filtering to avoid errors. Handle all corner cases
including empty input, missing columns, null values, malformed records,
duplicate columns, inconsistent column names, and non-dictionary inputs.
Preserve row order and valid data, create a clean filtered copy of the
DataFrame, and return the final output using to_dict(orient="records").
✅ Verify: the node output contains the reduced column set with no extra fields.
Step 8 — Write ML-ready data (Data Writer → PostgreSQL)
Goal: persist the anonymized, trimmed dataset to a PostgreSQL table. (~2 min)
- Drag a Data Writer node (Write type) after Clean Patient Fields and connect the edge.
- Set the destination to your PostgreSQL connection and target table.
- Choose the write mode (append or upsert) appropriate for your table.
- Click Apply.
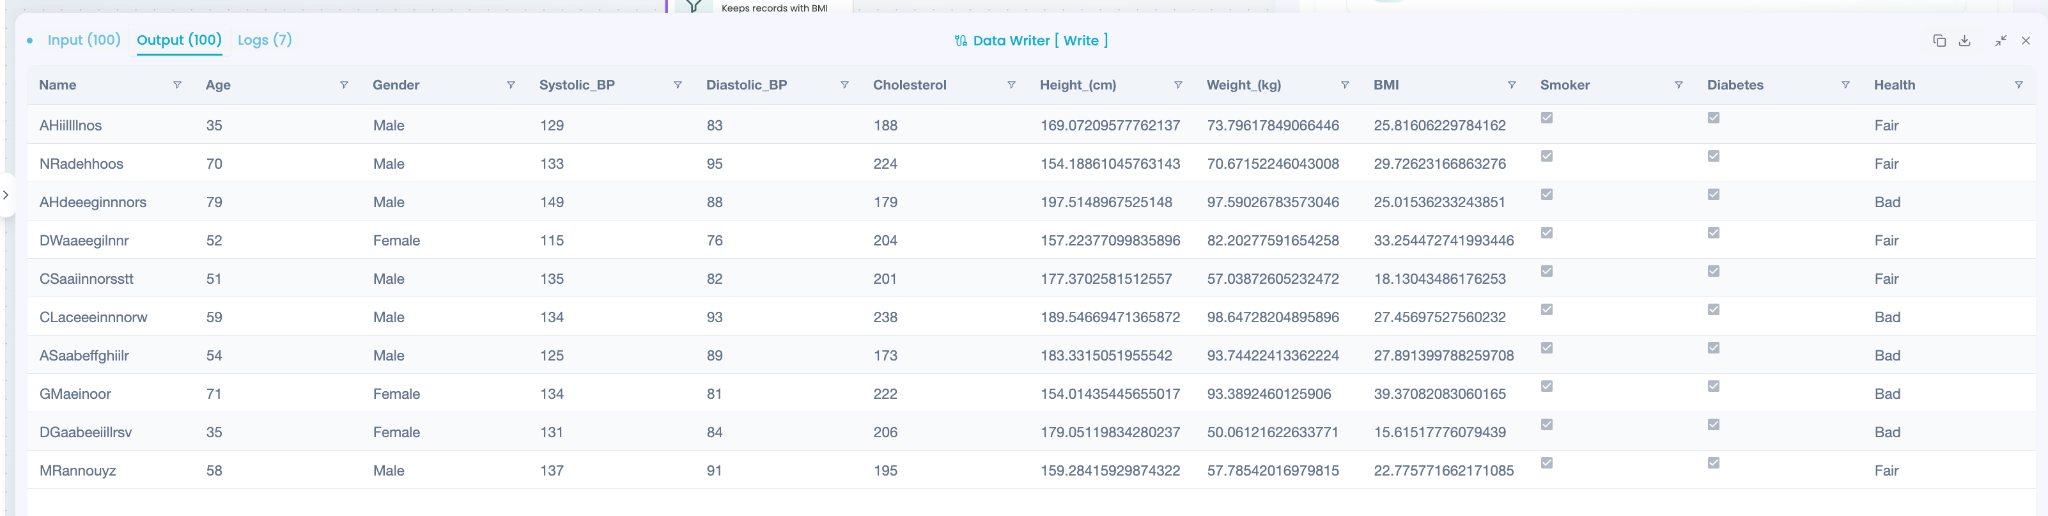
✅ Verify: the Data Writer node is connected at the end of Branch A and points to your PostgreSQL table.
Branch B — Feature engineering, scoring & segmentation
This branch engineers categorical features, then splits again into a scoring/segmentation path and a feature-selection path.
Step 9 — Feature Engineering (NLP-Tune)
Goal: add BP_Category, Cholesterol_Category, and BMI_Category columns. (~4 min)
- From the Filter BMI Variance node, drag an NLP-Tune node onto the second branch and connect the edge.
- In the Code tab, paste the prompt below and run it.
- Review and save the generated code, then click Apply.
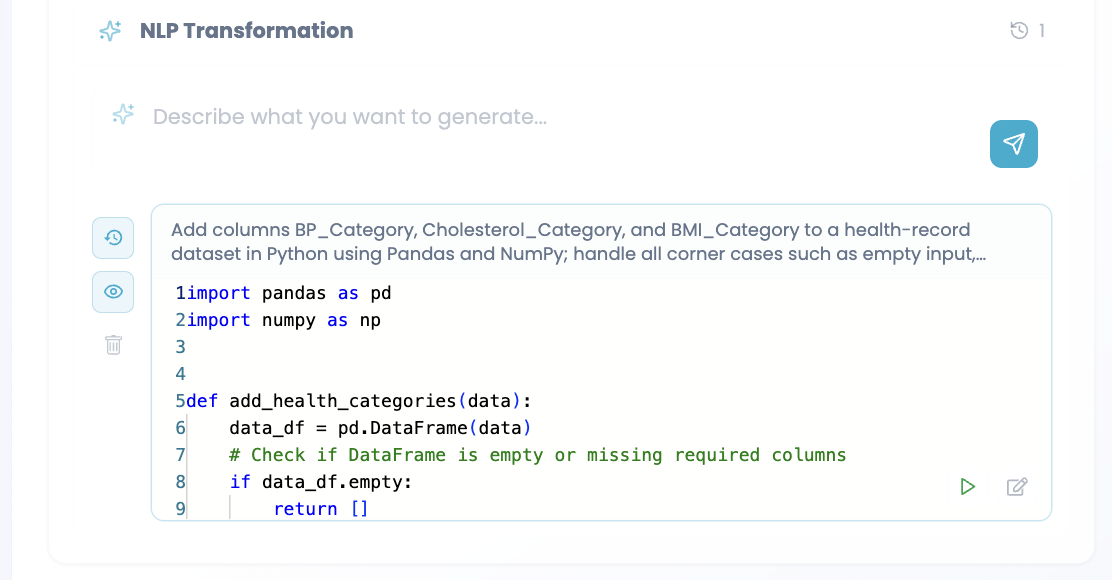
Add columns BP_Category, Cholesterol_Category, and BMI_Category to a
health-record dataset in Python using Pandas and NumPy. Handle all corner cases
such as empty input, missing columns, null/NaN values, non-numeric values,
boundary values, and invalid data safely. Categorize using these rules:
Systolic_BP < 120 = "Normal", 120-139 = "Elevated", >=140 = "Hypertension";
Cholesterol < 200 = "Healthy", 200-239 = "Borderline", >=240 = "High";
BMI < 18.5 = "Underweight", 18.5-24.9 = "Normal", 25-29.9 = "Overweight",
>=30 = "Obese". Use efficient Pandas logic such as pd.cut(), preserve original
columns, set category values to None when inputs are missing or invalid, and
return to_dict(orient="records").
✅ Verify: the output now includes BP_Category, Cholesterol_Category, and BMI_Category. After this node the branch splits again.
Step 10 — Path B1: Risk Scoring (NLP-Tune)
Goal: compute the Metabolic_Risk_Score column from health factors. (~4 min)
- Drag an NLP-Tune node (Risk Scoring) onto path B1 after Feature Engineering and connect the edge.
- In the Code tab, paste the prompt below and run it.
- Review and save the generated code, then click Apply.
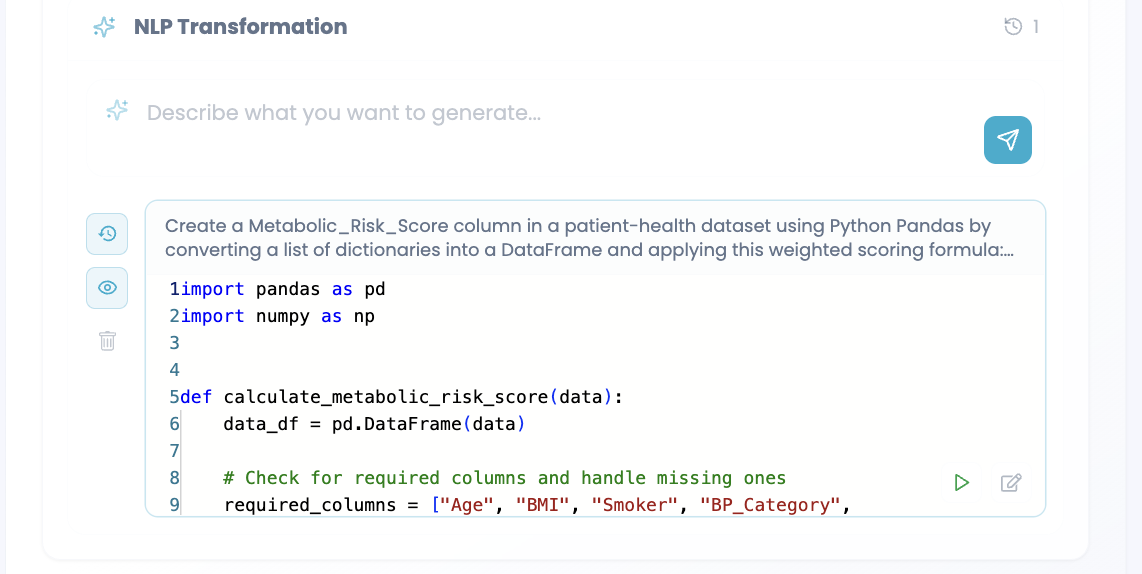
Create a Metabolic_Risk_Score column in a patient-health dataset using Python
Pandas by converting a list of dictionaries into a DataFrame and applying this
weighted scoring formula: Age > 50 -> +2, BMI >= 30 -> +2, Smoker == True -> +1,
BP_Category == "Hypertension" -> +2, Cholesterol_Category == "High" -> +1, and
Diabetes == True -> +5. Calculate the score row-wise while safely handling all
corner cases including empty input, missing required columns, null/NaN values,
invalid data types, boolean inconsistencies, malformed records, duplicate
columns, and non-dictionary inputs. Avoid crashing when columns are absent by
validating them properly, preserve original data and row order, and return the
final dataset using to_dict(orient="records").
✅ Verify: the output includes a numeric Metabolic_Risk_Score for each row.
Step 11 — Path B1: Segment Health Groups (NLP-Tune)
Goal: flag high metabolic risk and optimal health groups, keeping only key columns. (~3 min)
- Drag an NLP-Tune node (Segment Health Groups) after Risk Scoring and connect the edge.
- In the Code tab, paste the prompt below and run it.
- Review and save the generated code, then click Apply.
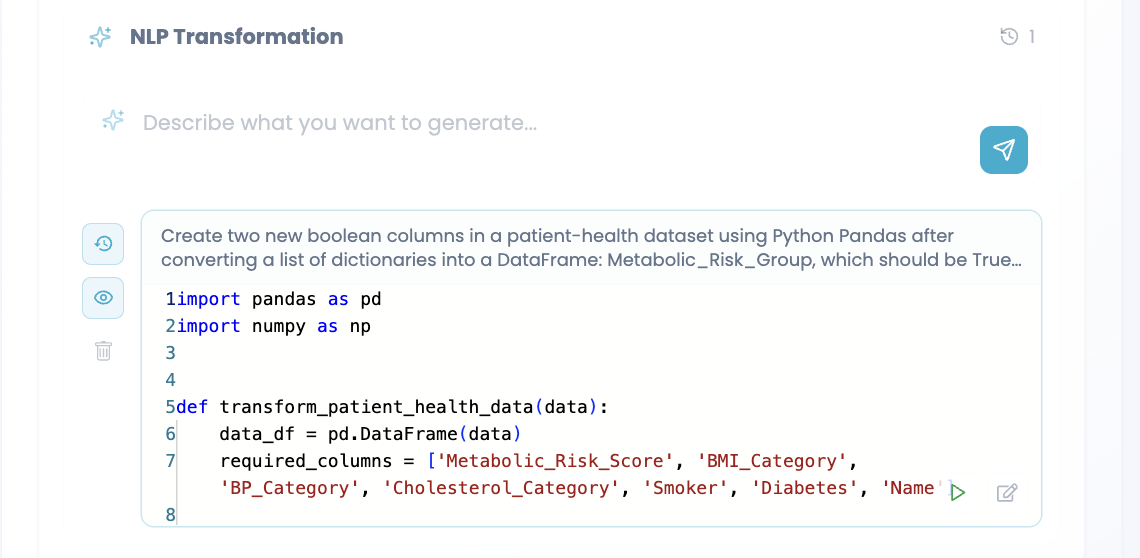
Create two new boolean columns in a patient-health dataset using Python Pandas
after converting a list of dictionaries into a DataFrame: Metabolic_Risk_Group,
which should be True when Metabolic_Risk_Score >= 6 and False otherwise, and
Best_Health_Group, which should be True only when all of these conditions are
satisfied simultaneously: BMI_Category == "Normal", BP_Category == "Normal",
Cholesterol_Category == "Healthy", Smoker == False, and Diabetes == False.
Handle all corner cases safely including empty input, missing columns, null/NaN
values, invalid or inconsistent boolean values, malformed records, duplicate
columns, and non-dictionary inputs without crashing. Validate required columns
before calculations, default invalid conditions safely to False, preserve row
order, and finally keep only these columns in the output: Name,
Metabolic_Risk_Group, and Best_Health_Group, returning the result using
to_dict(orient="records").
💡 Tip — output is intentionally narrow. This node keeps only Name, Metabolic_Risk_Group, and Best_Health_Group so the segmentation export stays lightweight.
✅ Verify: the output contains exactly three columns: Name, Metabolic_Risk_Group, and Best_Health_Group.
Step 12 — Path B1: Write segments (Data Writer → S3)
Goal: persist the three-column segmentation output to S3. (~2 min)
- Drag a Data Writer node (Write) after Segment Health Groups and connect the edge.
- Set the destination to your S3 bucket and provide the object path/prefix.
- Confirm the output contains only
Name,Metabolic_Risk_Group, andBest_Health_Group. - Click Apply.
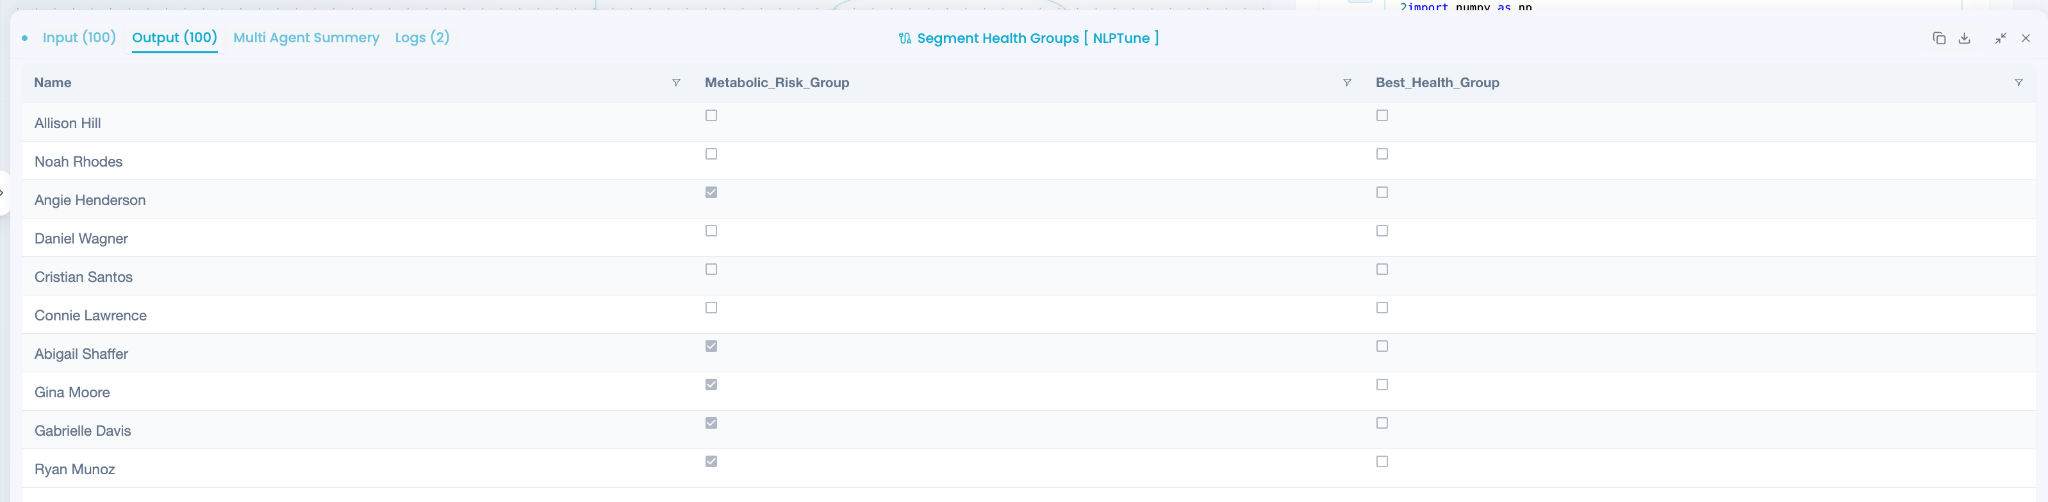
✅ Verify: the Data Writer node is connected at the end of path B1 and points to your S3 bucket.
Step 13 — Path B2: Select Key Features (NLP-Tune)
Goal: extract name, category, and risk-score columns for the feature table. (~3 min)
- From the Feature Engineering node, drag an NLP-Tune node (Select Key Features) onto path B2 and connect the edge.
- In the Code tab, paste the prompt below and run it.
- Review and save the generated code, then click Apply.
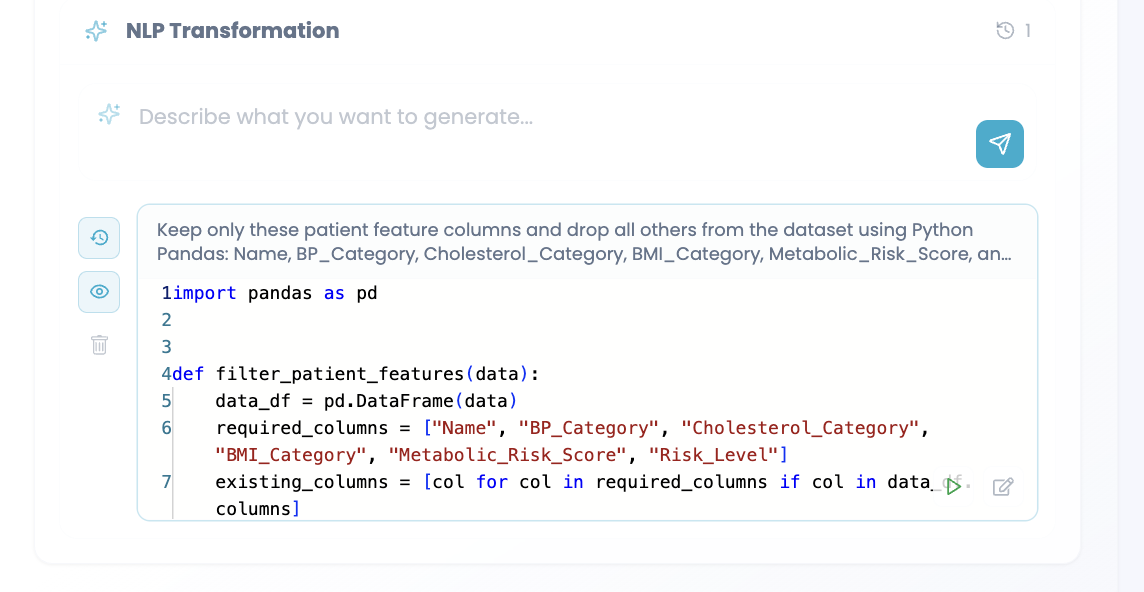
Keep only these patient feature columns and drop all others from the dataset
using Python Pandas: Name, BP_Category, Cholesterol_Category, BMI_Category,
Metabolic_Risk_Score, and Risk_Level. First convert the input list of
dictionaries into a DataFrame, then safely check which columns actually exist
before filtering to avoid errors. Handle all corner cases including empty input,
missing columns, null/NaN values, malformed records, duplicate columns,
inconsistent column names, and non-dictionary inputs. Preserve row order and
valid data, create a clean filtered copy of the DataFrame, and return the final
result using to_dict(orient="records").
✅ Verify: the output contains only the listed feature columns (those that exist in the data).
Step 14 — Path B2: Write features (Data Writer → PostgreSQL)
Goal: persist the selected feature columns to a PostgreSQL table. (~2 min)
- Drag a Data Writer node (Write) after Select Key Features and connect the edge.
- Set the destination to your PostgreSQL connection and target feature table.
- Click Apply.
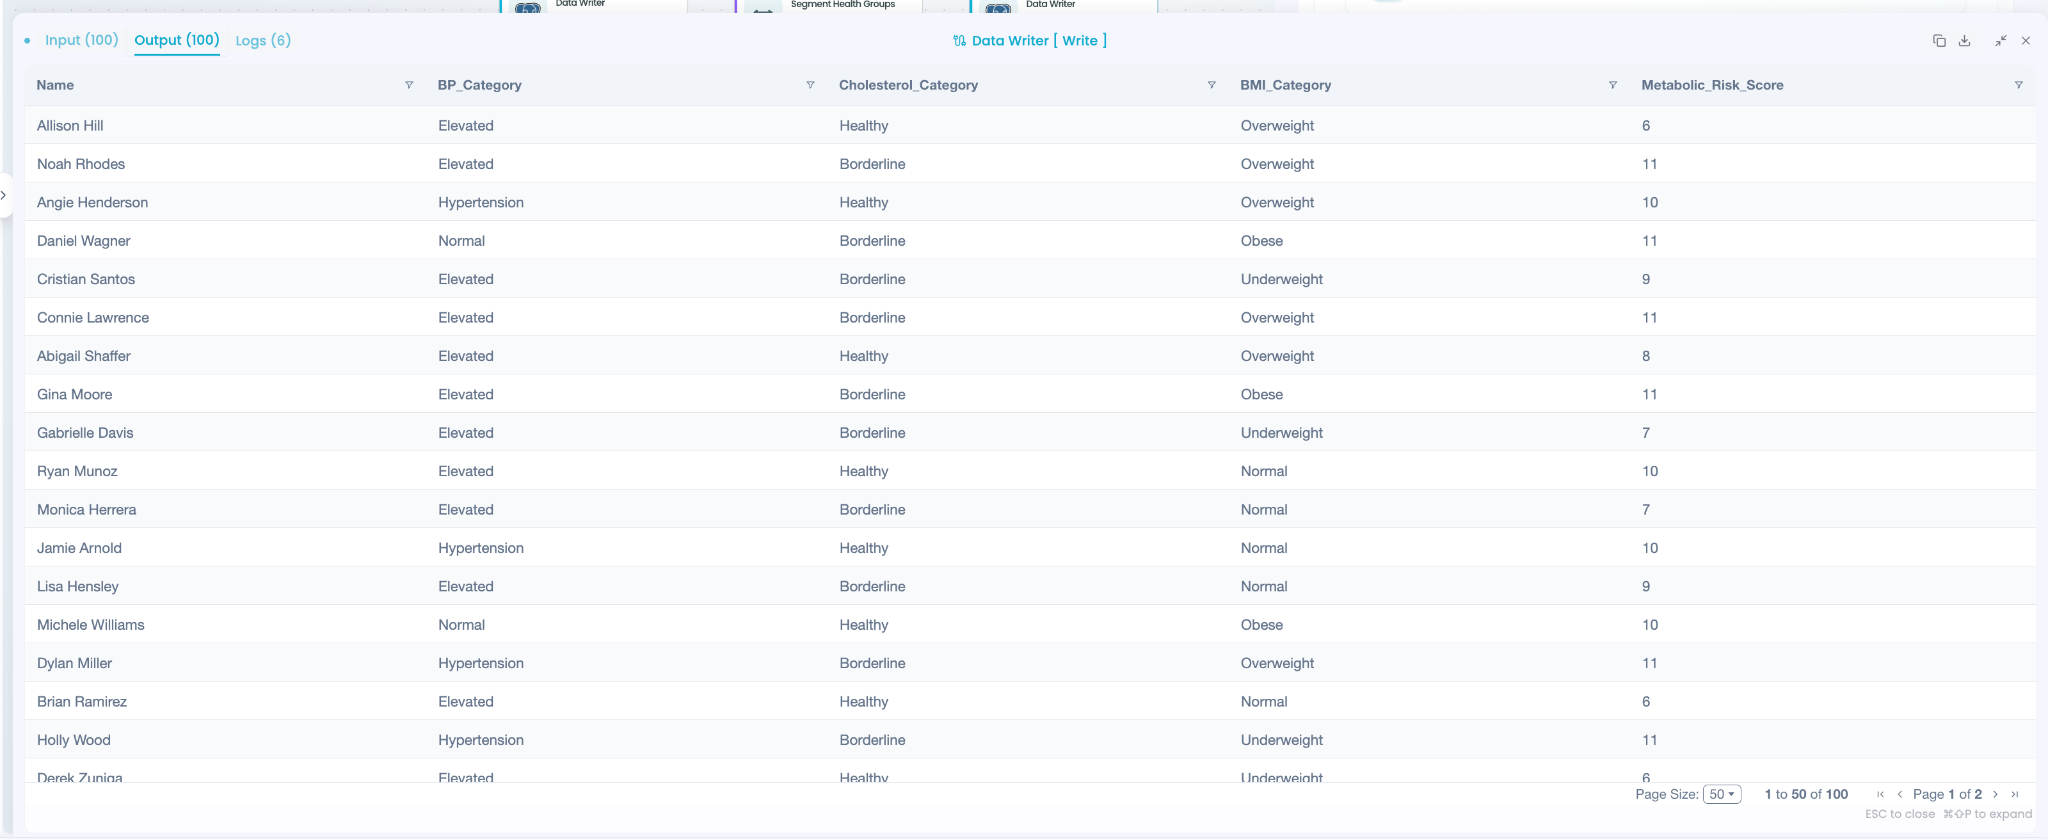
✅ Verify: the Data Writer node is connected at the end of path B2 and points to your PostgreSQL table.
Step 15 — Save, publish, and test
Goal: persist your work, promote it, and send a sample request. (~4 min)
- Click Save in the bottom-left of the canvas.
- Click Republish (or Publish on first publish) and confirm the publish target.
- Open the Webhook Trigger in test mode, deploy the API if needed, and send a sample request.
- Watch the trace panel — each node lights up in sequence across both branches.
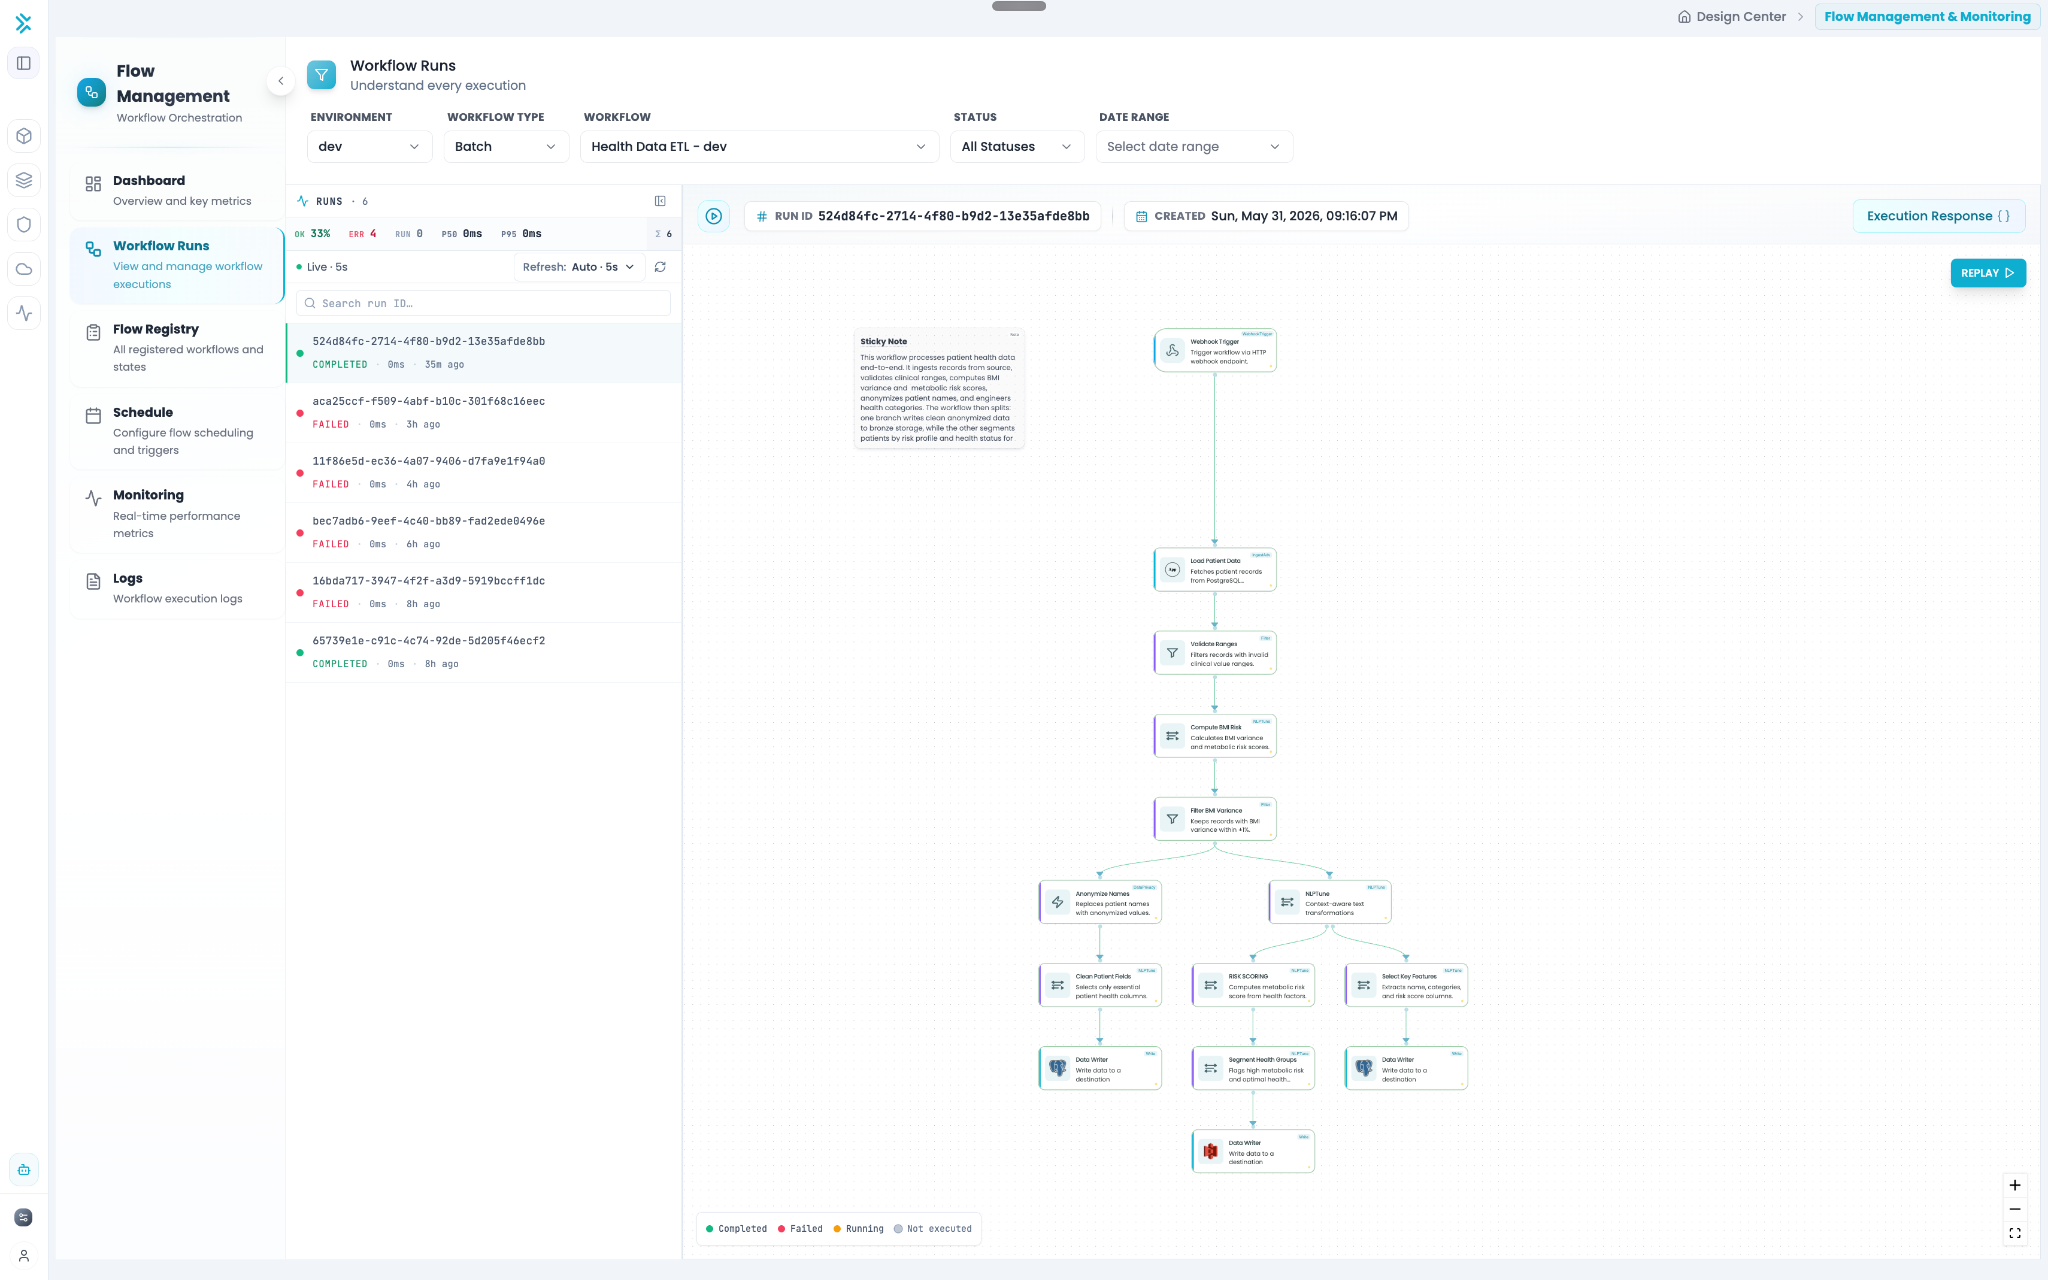
⚠ Always re-publish after edits. Saved-but-unpublished changes won't run when the webhook fires. If the workflow looks correct but isn't executing, confirm the latest version is published.
✅ Verify: the trace panel shows green checkmarks on all nodes, and the PostgreSQL and S3 destinations receive their expected outputs.
You're done — what's next
You've built, configured, published, and tested an end-to-end patient health data pipeline with validation, NLP-generated transformations, anonymization, scoring, and segmentation across two branches. Keep going:
- Agentic Invoice Extraction — a document pipeline with OCR, self-scored confidence, and Human-in-the-Loop review.
- CRM Enrichment and Lead Scoring — a multi-agent enrichment and scoring pipeline.
- Traceability — full run observability for pipelines like this one.
Troubleshooting
| Symptom | Likely cause | Resolution |
|---|---|---|
| Load Patient Data returns 0 rows | Wrong table/file or source credentials | Open the node → verify the connection and dataset, then re-run |
| Branches receive far fewer rows than expected | Validate Ranges or Filter BMI Variance too strict | Check the ±1% variance threshold and the clinical range bounds |
| NLP-Tune node errors on run | Column names in the data don't match the prompt | Confirm Height_(cm), Weight_(kg), BMI, etc. exist in the upstream output |
| S3 / PostgreSQL write fails | Missing or invalid destination credentials | Open the Data Writer node → verify the destination connection |
Glossary
- IngestAdv (Load Patient Data) — a source node that fetches records from a database (e.g. PostgreSQL) or file (e.g. S3 CSV) into the workflow.
- Filter — a node that keeps or drops records based on a Filter Builder of AND/OR conditions.
- NLP-Tune — a Natural-Language Code Generation node that turns a prompt into runnable Python/Pandas transformations.
- Data Privacy (Anonymize) — a node that applies privacy rules such as masking to selected columns, with an optional fixed random seed.
- Data Writer — a node that writes the processed dataset to a destination such as PostgreSQL or S3.
- BMI variance — the percentage difference between recomputed BMI (
BMI_real) and the storedBMIvalue. - Metabolic Risk Score — a weighted score computed from age, BMI, smoking, blood pressure, cholesterol, and diabetes factors.